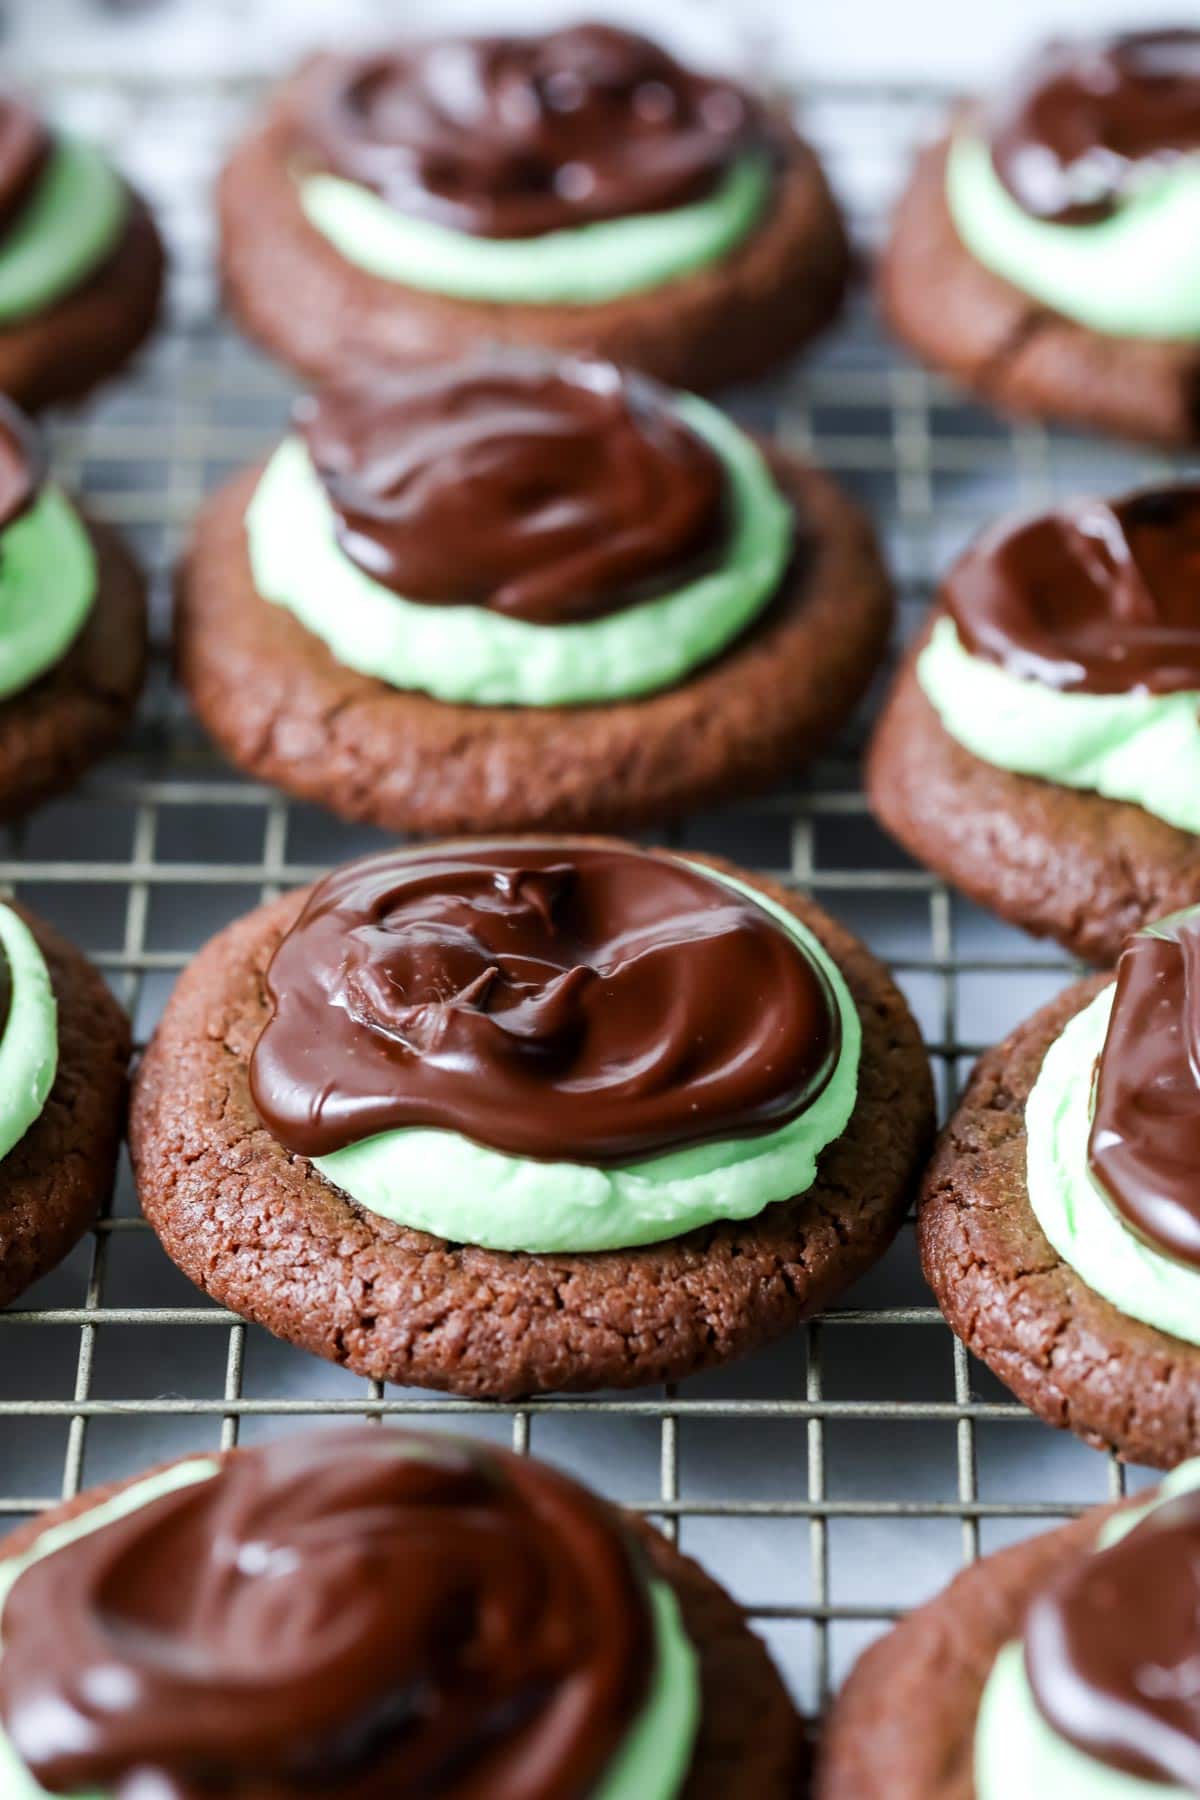
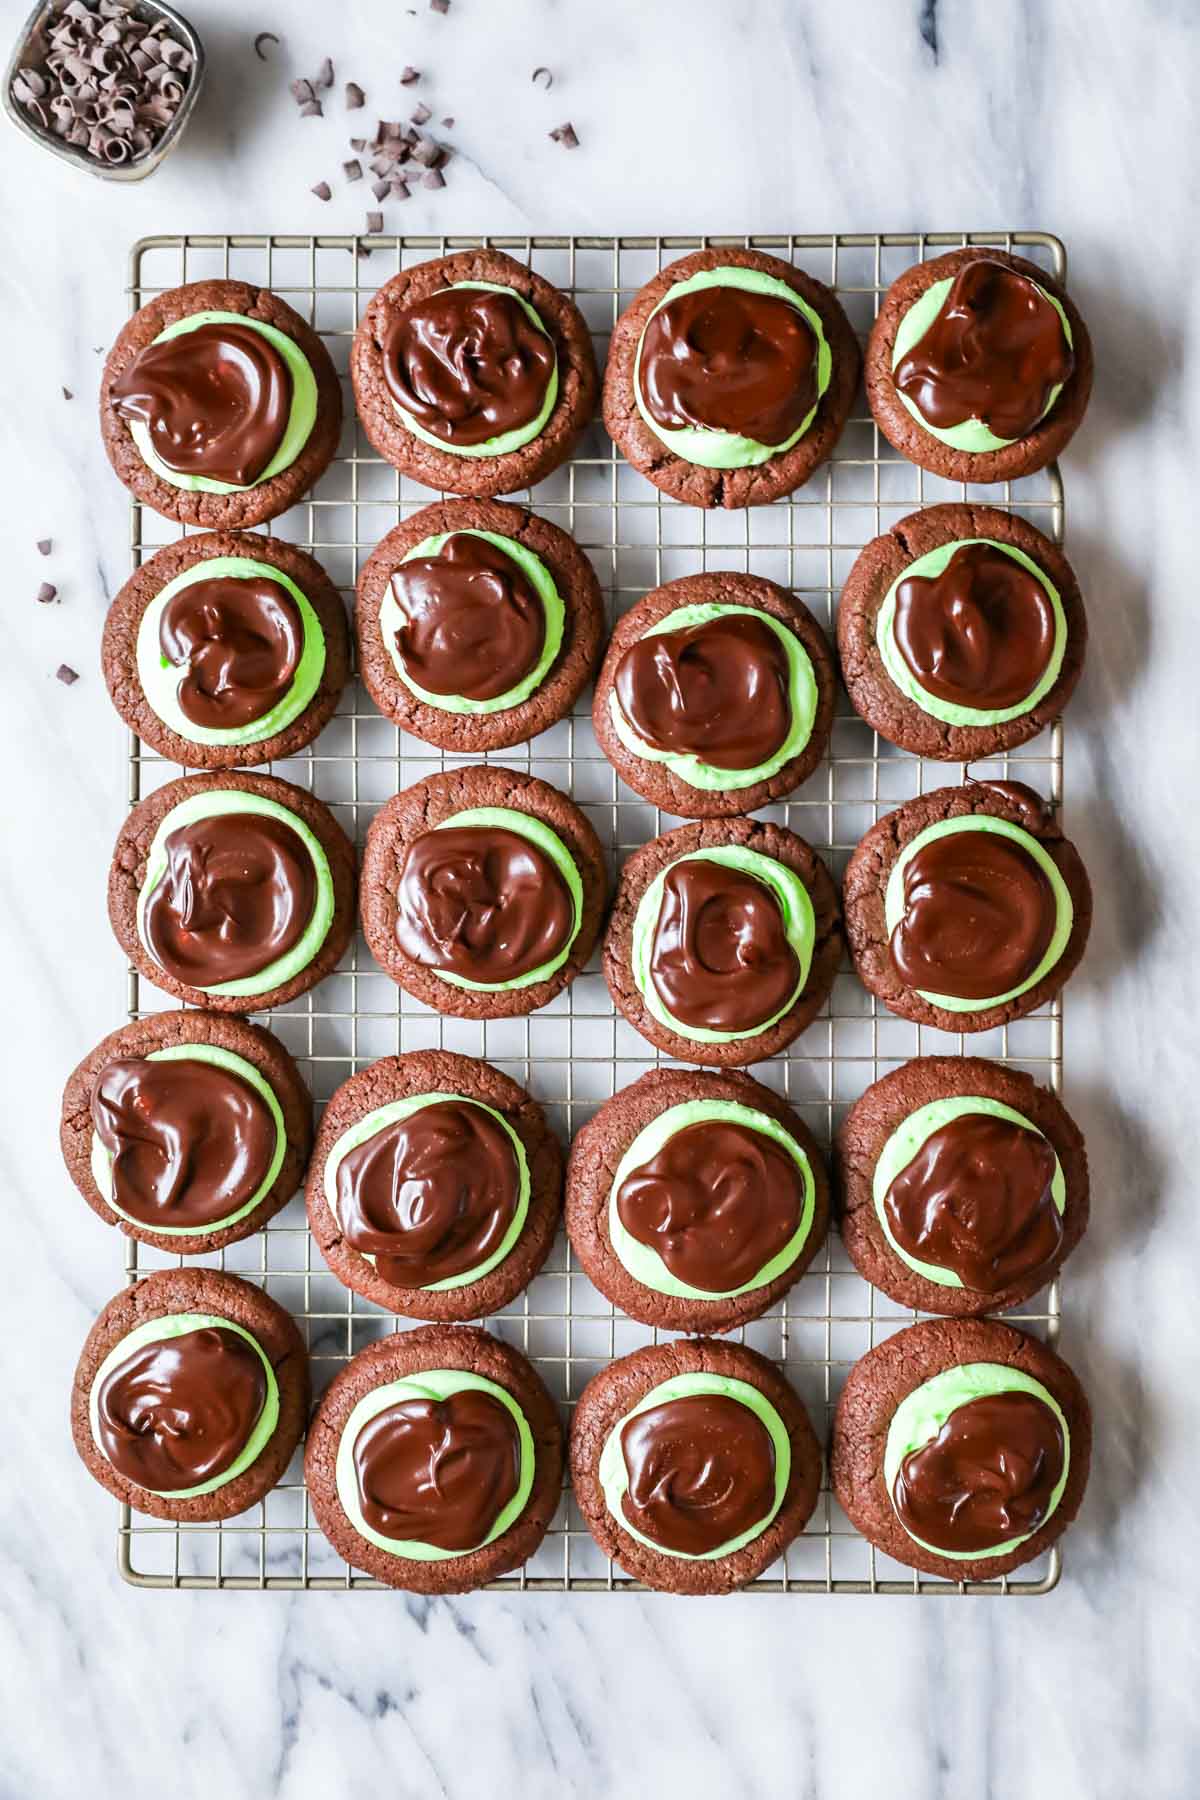
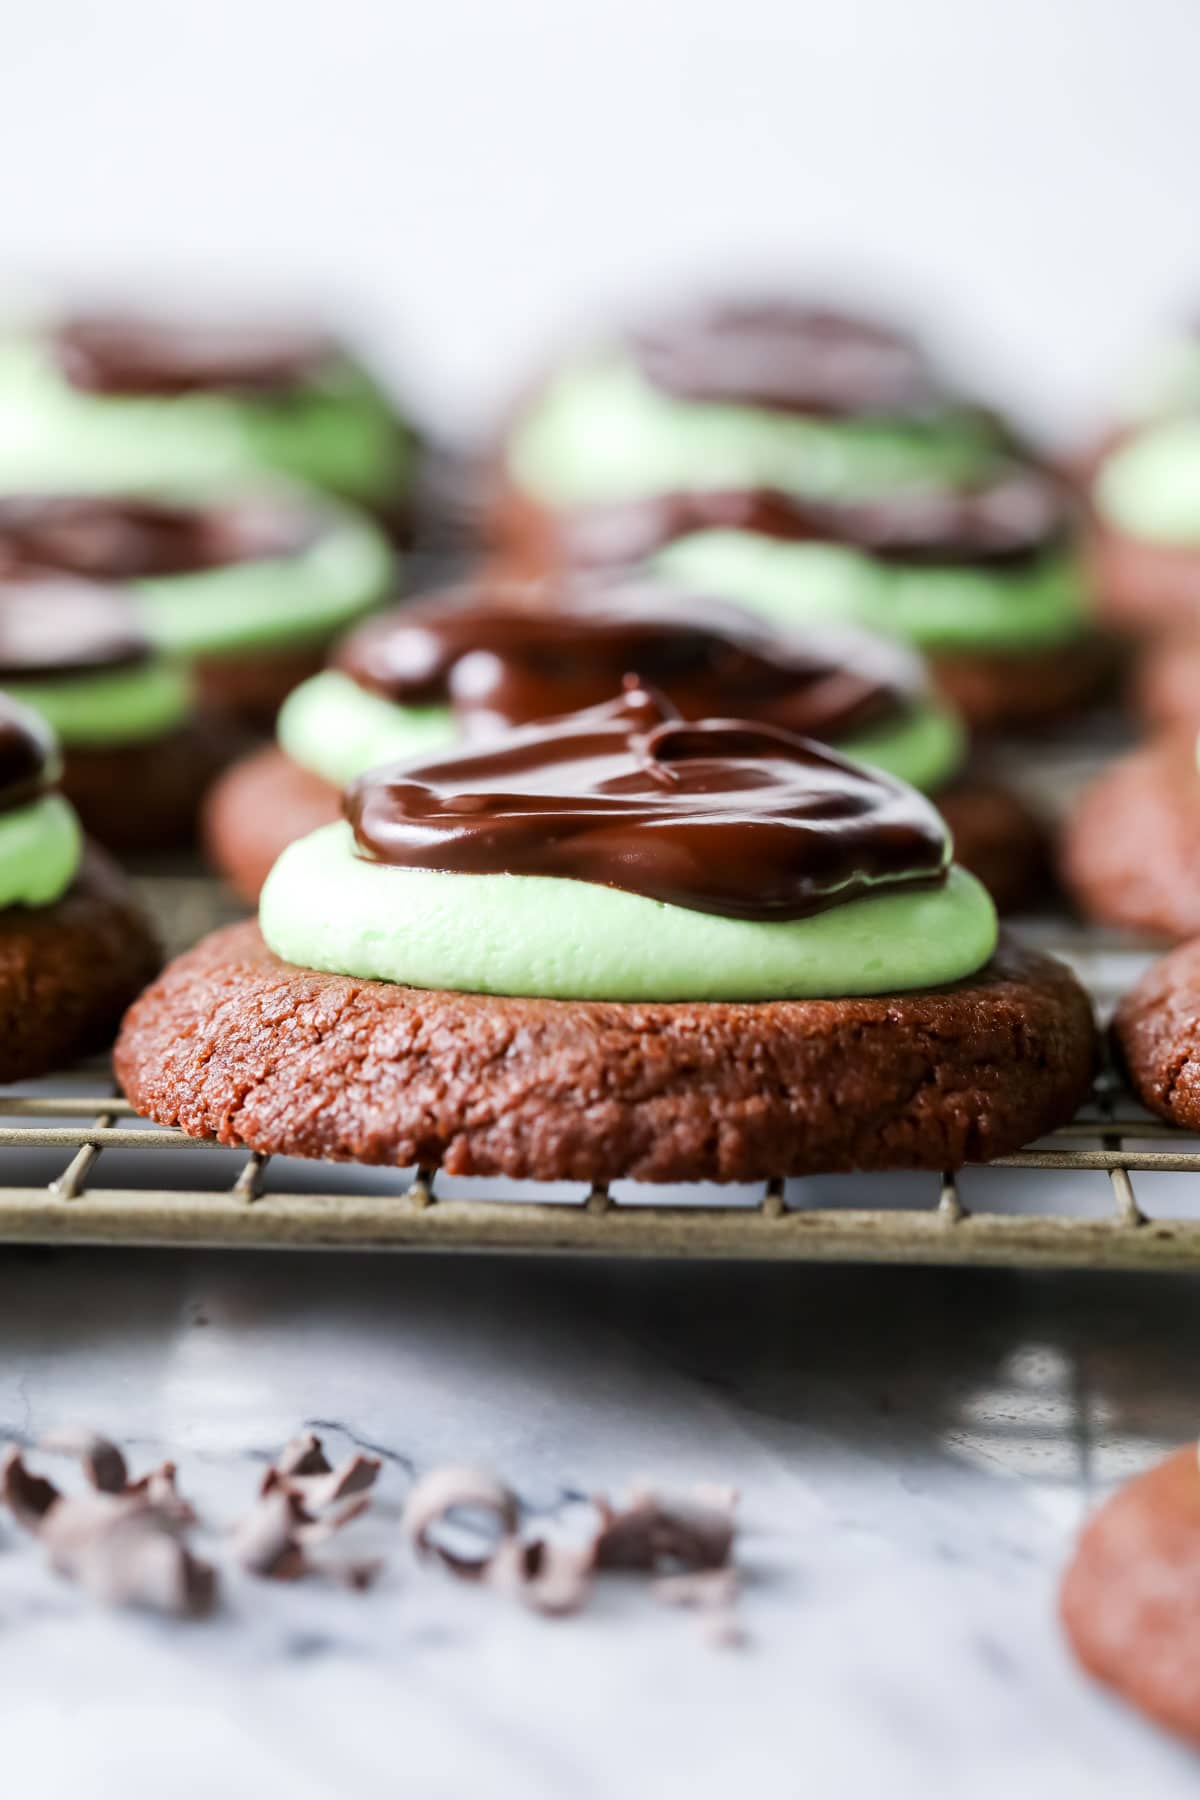
My mint chocolate cookies combine fudgy chocolate cookies with creamy mint frosting and rich chocolate ganache. These are positively gourmet! Recipe includes a how-to video!
Frosted Mint Chocolate Cookies
If you’re looking for a pretty green dessert to make for St. Patrick’s Day, look no further! Not only are these mint chocolate cookies a soft shade of mint green (like a Shamrock Shake!), they are also incredibly tasty.
This recipe pairs the soft and chocolatey cookies from my buckeye cookies with a mint frosting and smooth chocolate ganache. The cookie base is sturdy enough to hold the frosting and ganache, but still soft somewhat like a lofthouse cookie. It’s so good.
These are the latest addition to my collection of anything-but-basic, gourmet cookies. They’re a little more work than your standard chocolate chip cookies, but the end result is absolutely worth the extra effort!
Why You’ll Love This Recipe
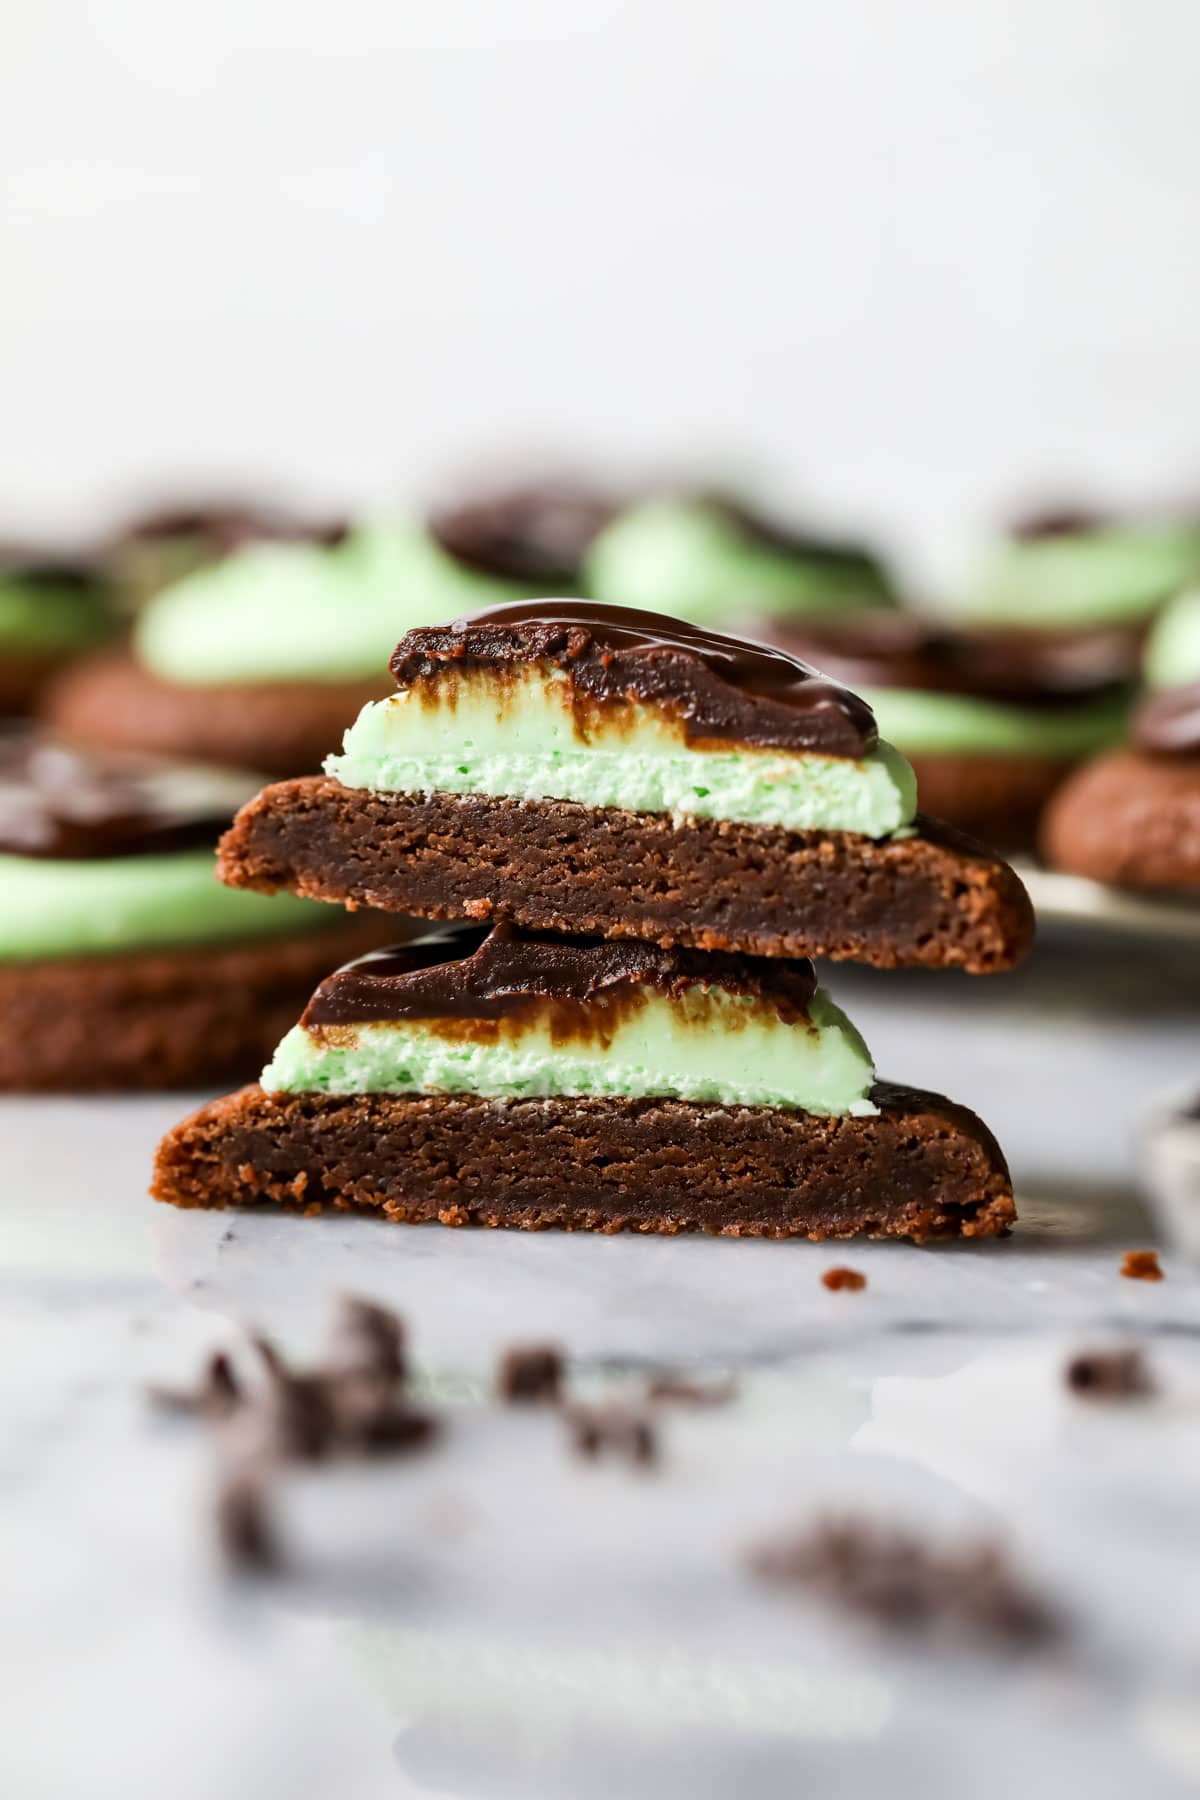
- Appearance: these look like bakery-style, gourmet cookies. They are SO festive for St. Patrick’s Day (if you use the green food coloring, that is)!
- Flavor: distinct chocolate cookie base, subtle mint frosting (like a thin mint), and rich chocolate ganache topping. These are a mint chocolate lover’s dream cookie!
- Technique: we’ll start with melted butter, which means we 1) don’t need a mixer for the dough and 2) infuse a rich, buttery flavor throughout. We’ll also take advantage of the warm melted butter to bloom our cocoa powder.
- Time: just 30 minutes of chilling. This creates a thick and sturdy base for our frosting topping!
What You Need
I won’t go over every ingredient we’ll be using, but I would like to mention a few important ones.
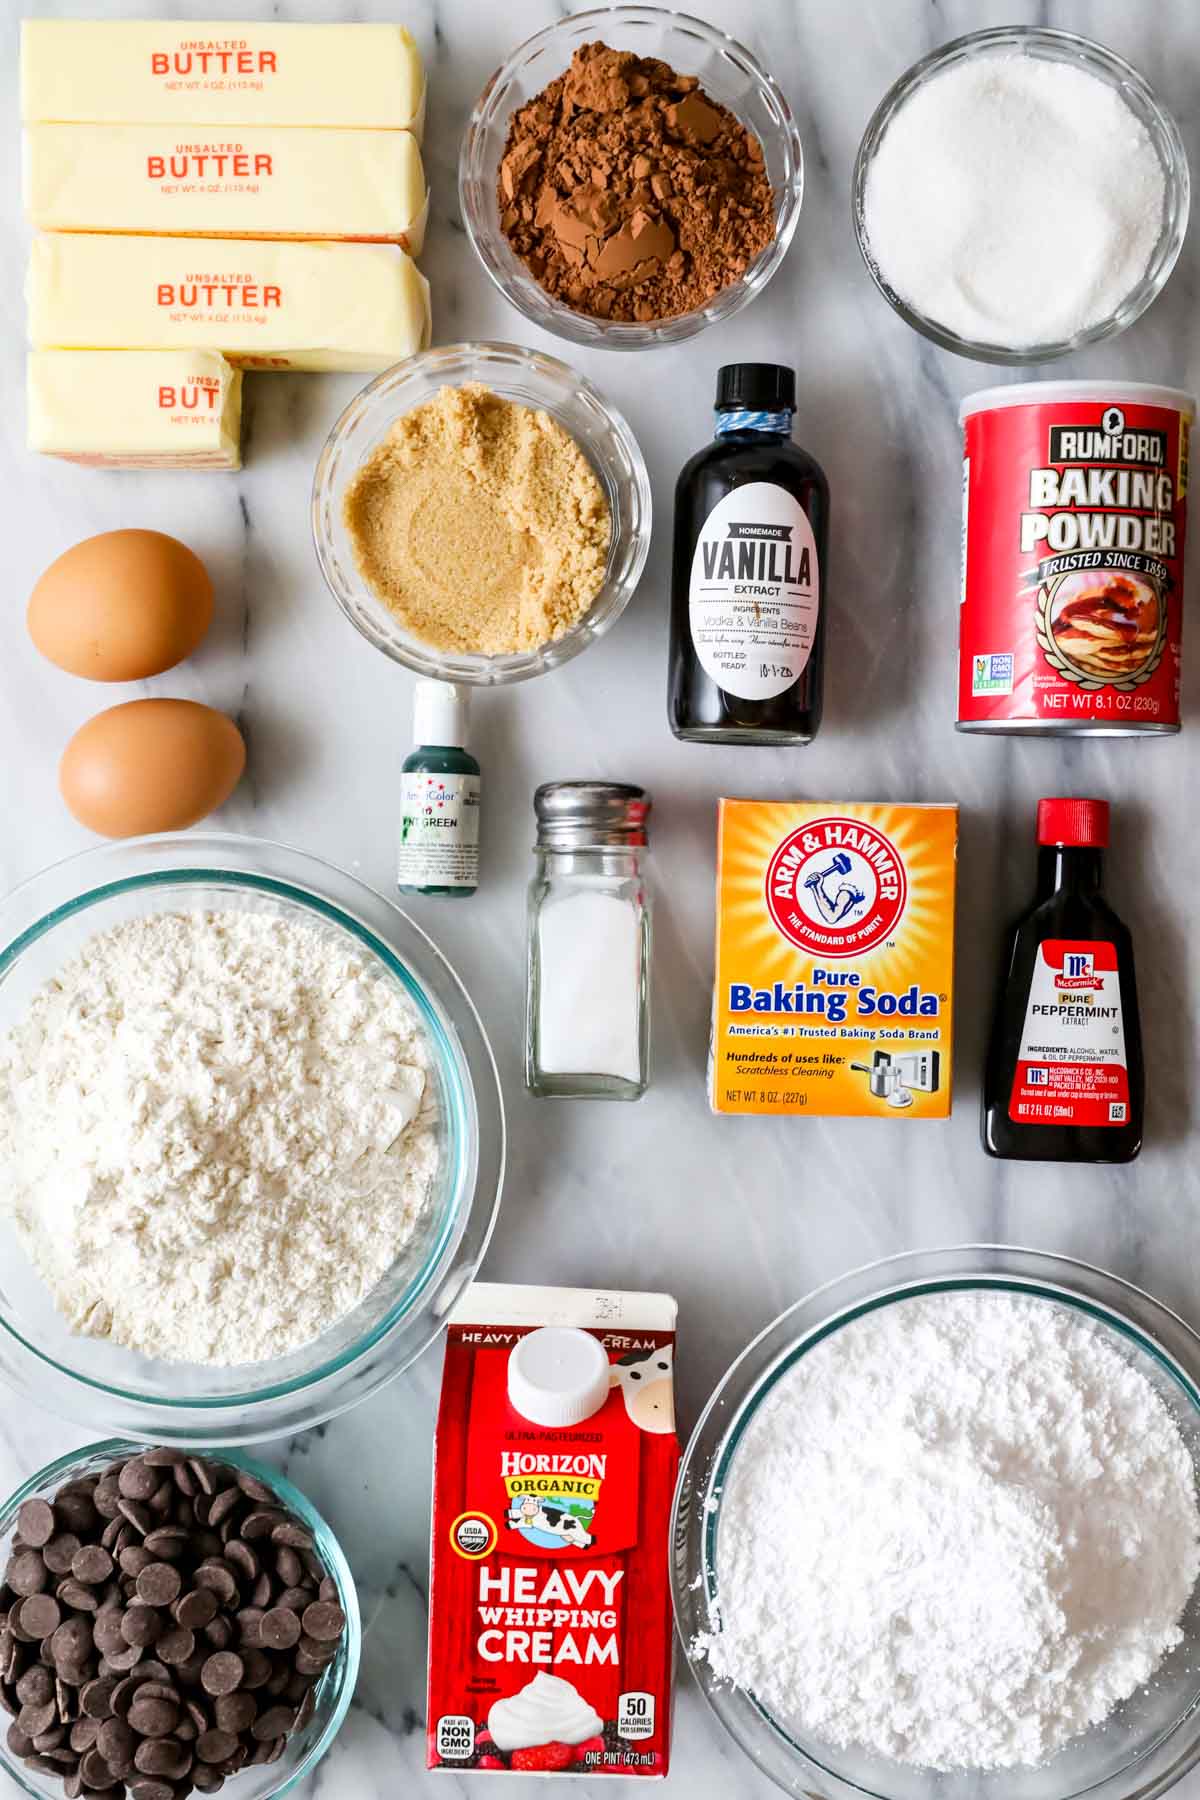
- Butter. Yes, that is quite a lot of butter up there. Remember, we are making (almost) two dozen cookies and icing, so it’s necessary! Make sure you use unsalted butter, since we are adding salt ourselves.
- Cocoa powder. I prefer natural cocoa powder in this recipe. I find that Dutch process cocoa is a bit more intense (in a distracting sort of way), and I liked the natural cocoa better. Either will work fine here though!
- Egg + egg yolk. Adding an extra egg yolk makes for tender, chewy cookies. Save your egg white for meringue cookies or candied almonds!
- Peppermint extract. While you may be tempted to reach for the “mint” extract, trust me on this one. Just like when we made my butter mints or cream cheese mints, peppermint extract actually imparts the best mint flavor without tasting like toothpaste (which mint extract would do).
- Food coloring. This is optional, but if you want to color your mint frosting, I recommend using a gel food coloring. I link to the specific one I used in the recipe below. Of course, you could use any color you like, but I personally like mint green for a St. Patrick’s Day look!
SAM’S TIP: You might be hesitant to add the vanilla extract to the frosting since we are already adding peppermint extract, but trust me! It deepens the flavor of the buttercream in such a nice way. I do this in the frosting for my peppermint bark whoopie pies too!
Remember, this is just an overview of the ingredients I used and why. For the full recipe please scroll down to the bottom of the post!
How to Make Mint Chocolate Cookies
Make the Dough
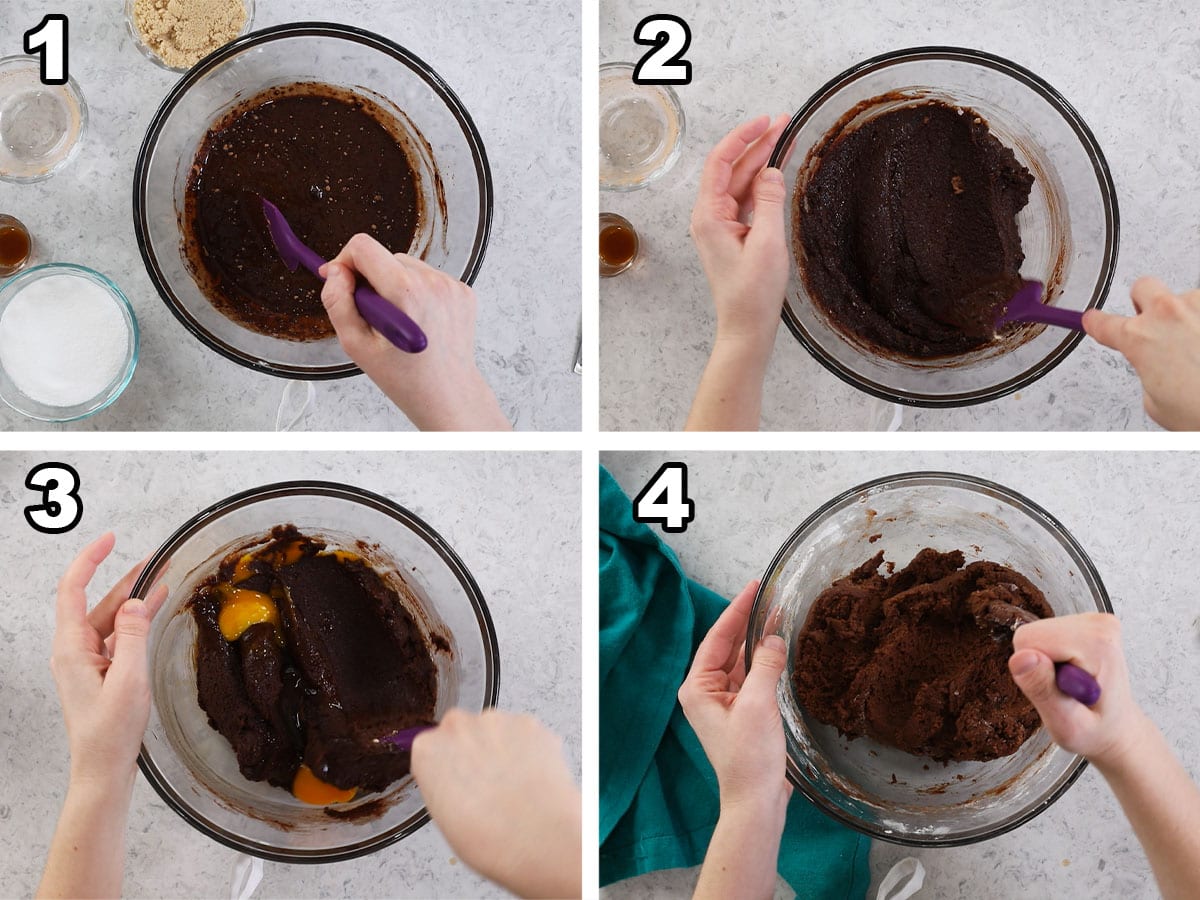
- Whisk together the cocoa powder and melted butter until well combined. You can do this while the butter is still hot (it will help bloom the cocoa), but just make sure to wait to move on to the next step until the butter has cooled down again.
- Add the sugars and stir well to incorporate.
- Stir in the eggs and vanilla, then set aside.
- Whisk together the dry ingredients in a separate bowl, then gradually add them to the wet ingredients. It’s important that you do this step gradually, otherwise it will be a challenge getting the dough to come together. Cover and chill the dough for 30 minutes.
Bake
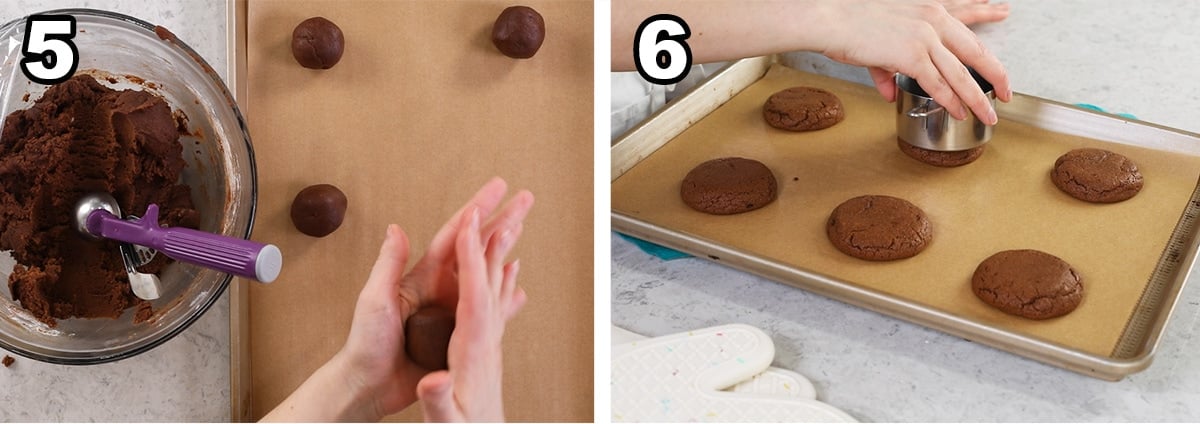
- Scoop and roll the dough into smooth balls, then bake.
- Gently flatten the cookies with the bottom of a cup, then let cool completely. Flattening the cookies will give you a flat surface for the frosting, and it will also encourage a more dense, brownie-like texture.
Icing
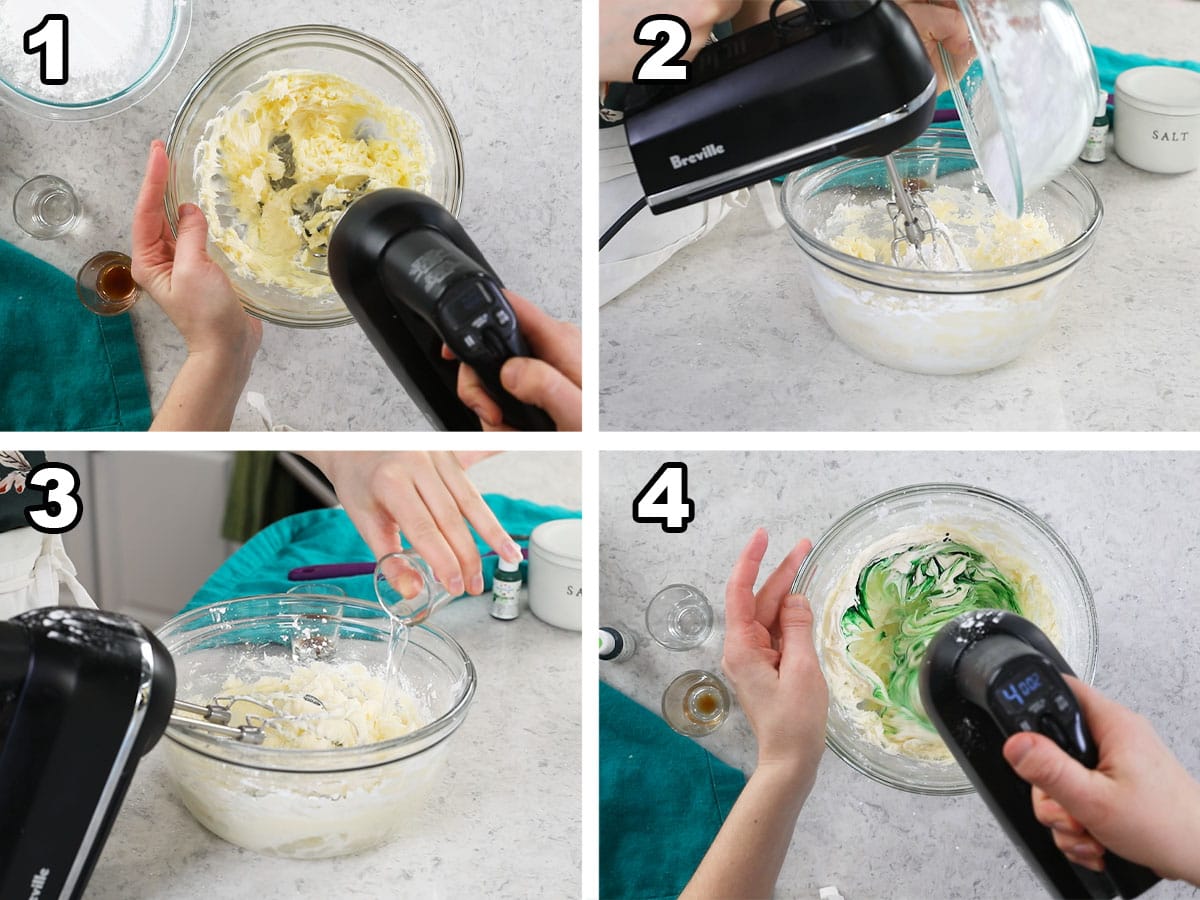
- Beat the butter with an electric mixer until smooth.
- Add the sugar gradually until well combined. Do this on low speed so you don’t fling powdered sugar everywhere (I’ve been there many times)!
- Stir in the salt and extracts until incorporated.
- Add the food coloring, if using, and stir well until the frosting is evenly colored.
Ganache/Assembly
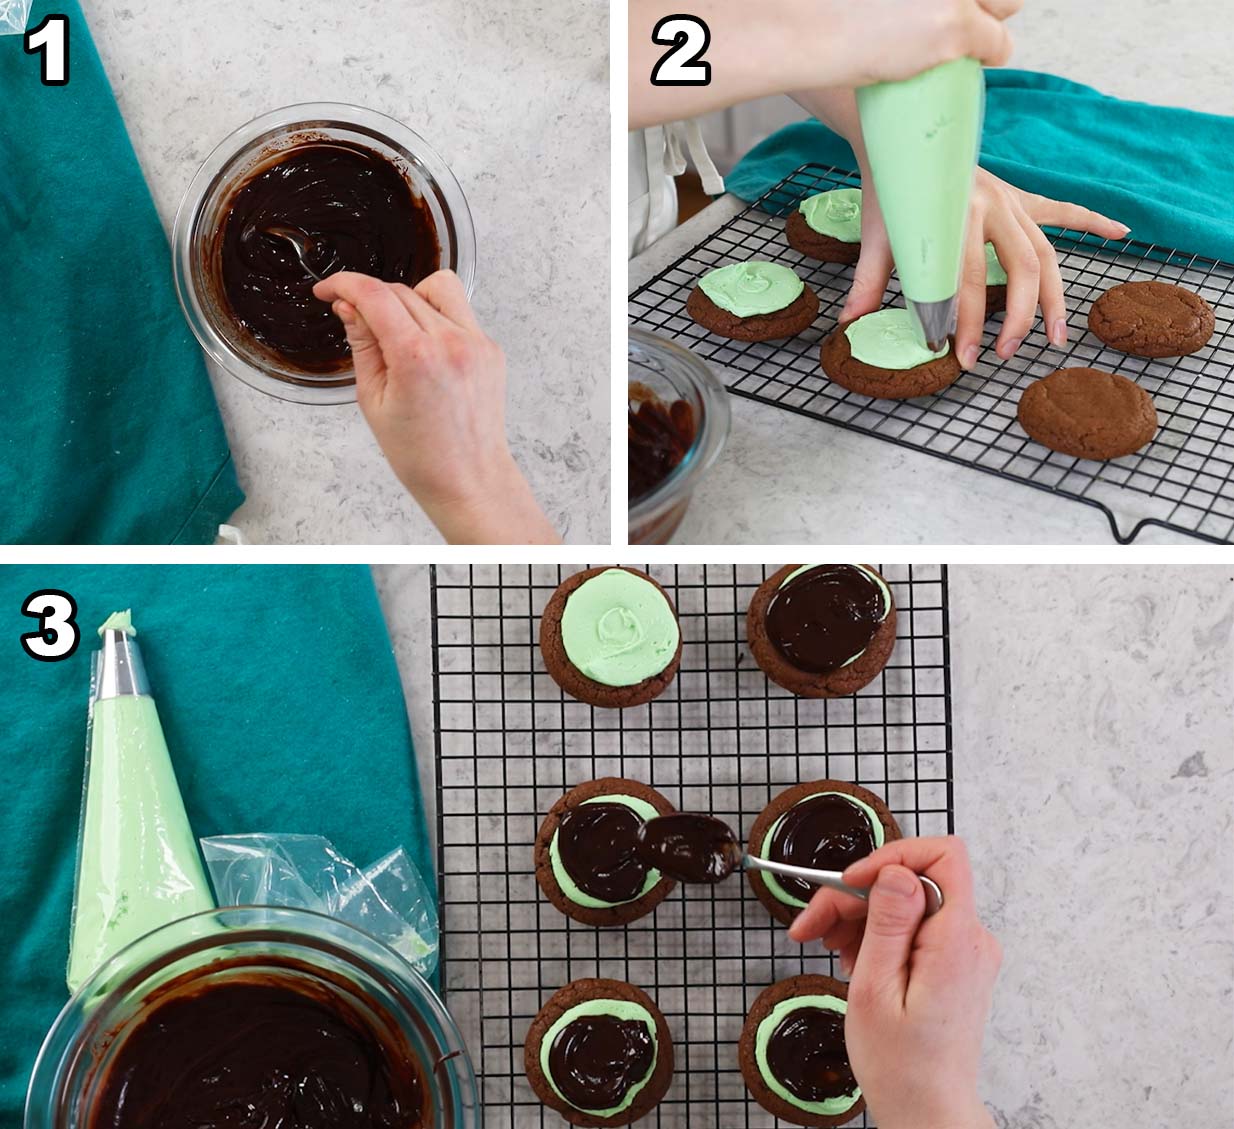
- Make the ganache by microwaving the chocolate and cream until smooth and melted.
- Pipe or spread frosting on top of each cookie.
- Spoon ganache over the frosting and let set before enjoying.
SAM’S TIP: Make sure to let the cookies cool completely! They’ll fall apart if you ice them while they are still warm.
Frequently Asked Questions
You can if you want to (they’ll keep longer this way!), but I personally prefer to enjoy them at room temperature. You can keep them at room temperature for up to 2 days. They’ll keep in the fridge for up to 5 days (covered, in an airtight container) but you can always pull them out and let them sit at room temperature for 15 minutes before enjoying.
Yes, but note that the dough will be a bit more dry and difficult to scoop after chilling for several days. It also may need to sit at room temperature to soften a bit before you can scoop it. Make sure to cover it well and store for up to several days.
You could, but I find the flavor of mint extract makes the frosting taste like toothpaste. If that’s your thing, go for it–otherwise stick with peppermint! And yes, you can still call these mint chocolate cookies, even with the peppermint extract 😊
Mint chocolate lovers, stay tuned! I have a mint chocolate cake coming your way next week.
Enjoy!
Let’s bake together! Subscribe to my newsletter to be notified of all the newest recipes, and find my free recipe tutorials on YouTube 💜

Mint Chocolate Cookies
Ingredients
Cookies
- 1 cup (226 g) unsalted butter melted
- ½ cup (50 g) natural cocoa powder
- 1 cup (200 g) granulated sugar
- ¾ cup (150 g) light brown sugar firmly packed
- 1 large egg + 1 egg yolk
- 1 teaspoon vanilla extract
- 2 ¼ cups (280 g) all-purpose flour
- 1 teaspoon baking powder
- ¼ teaspoon baking soda
- ¾ teaspoon salt
Mint Frosting
- ¾ cups (170 g) unsalted butter softened
- 2 ½ cups (312 g) powdered sugar
- ⅛ teaspoon salt
- 1 ½ teaspoon peppermint extract
- ½ teaspoon clear vanilla extract
- Green food coloring optional
Ganache
- 1 cup (170 g) semisweet chocolate chips or couverture chocolate
- ¼ cup (60 ml) heavy cream
Recommended Equipment
Instructions
- Combine melted butter and cocoa powder in a large mixing bowl and stir until well combined.1 cup (226 g) unsalted butter, ½ cup (50 g) natural cocoa powder
- Add sugars and stir well.1 cup (200 g) granulated sugar, ¾ cup (150 g) light brown sugar
- Add egg, egg yolk, and vanilla extract and stir.1 large egg + 1 egg yolk, 1 teaspoon vanilla extract
- In a separate medium-sized bowl, whisk together flour, baking powder, baking soda, and salt.2 ¼ cups (280 g) all-purpose flour, 1 teaspoon baking powder, ¼ teaspoon baking soda, ¾ teaspoon salt
- Gradually add dry ingredients to wet, stirring until completely combined.
- Cover dough with plastic wrap and chill in the refrigerator for 30 minutes. Meanwhile, preheat oven to 350F (175C) and line a baking sheet with parchment paper.
After Chilling
- Once dough has chilled, scoop cookie dough by 2 tablespoon-sized scoop and roll between your palms to form a smooth ball. Place on prepared baking sheet, spacing cookies at least 2” (5cm) apart.
- Bake in center rack of 350F (175C) preheated oven for 10-11 minutes. Within 1 minute of removing from the oven, gently flatten the surface of the cookie using a clean, flat surface (I use the bottom of a 1-cup measuring cup). This will give you a smooth/flat surface for the frosting. Allow to cool completely before decorating.
Mint Frosting
- Place butter in a large mixing bowl and use an electric mixer to beat until smooth and creamy.¾ cups (170 g) unsalted butter
- Gradually add sugar and stir on low-speed until well combined.2 ½ cups (312 g) powdered sugar
- Add salt, vanilla extract, and peppermint extract. Stir well.⅛ teaspoon salt, 1 ½ teaspoon peppermint extract, ½ teaspoon clear vanilla extract
- Add food coloring (if using) and stir until evenly incorporated.Green food coloring
Ganache
- Combine chocolate and heavy cream in a medium-sized microwave-safe bowl.1 cup (170 g) semisweet chocolate chips or couverture chocolate, ¼ cup (60 ml) heavy cream
- Microwave on high for 25 seconds. Stir well. Microwave for another 25 seconds and stir again until you have a smooth consistency. If chocolate is still not melted, continue to microwave in 10 second increments until smooth.
Assembly
- Spread or pipe frosting evenly over cooled cookies (I use a piping bag fitted with an open tip).
- Use a spoon to drizzle or gently spread ganache over the frosting. Allow chocolate to set before enjoying.
Notes
Food coloring
This is optional but will give the cookies a mint-green hue. I used “Mint” Americolor gel food coloring for the cookies in the photos and video.Storing
Store cookies in an airtight container at room temperature for up to 2 days. Cookies may be refrigerated in an airtight container for up to 5 days, but I personally think they taste best at room temperature so I’ll remove mine from the fridge to sit at room temperature for 15 minutes before enjoying.Nutrition
Nutritional information is based on third-party calculations and should be considered an estimate only. Actual nutritional content will vary based upon brands used, measuring methods, cooking method, portion sizes, and more.



Sean G
I ran out of ganache with a few cookies to go – perhaps I was a bit generous – but otherwise these are exactly as described! Delicious! Thanks for developing!
Sam
I’m so glad you enjoyed them, Sean! 🙂
Janice D
these cookies are delicious but mine didn’t puff up, Why?
Sam
Hi Janice! They aren’t necessarily supposed to puff much, so it doesn’t sound like anything went wrong 🙂
Tracy
I made these yesterday and they are delicious! The frosting was too thick for me to pipe (broke the bag), so I just used the back of a spoon to smooth it out and it worked out perfectly with the ganache on top. I’m excited to make these again for St. Patrick’s Day. Thank you for sharing!!
Sam
I’m glad you enjoyed them, Tracy! If that happens again and you need to thin it out a bit you can just add a splash of milk or cream. 🙂
David Hendrix
Stop putting in the descriptions after each instruction. They are unnecessary.
Sam
Hi David! You’re the first person who has said they don’t like seeing this, most people have said it is helpful. I’m open to more feedback on this, but most people seem to like it.
Santos
It’s helpful to have. Thank you also for your soup recipes- they’re wonderful.
Catherine Dobbs
I love these!!! and please keep the descriptions!!! they are so helpful to this mama! when my toddler is jumping everywhere hehe
Sam
I’m so glad everyone enjoyed them so much, Catherine! 🙂