My easy lemon tart recipe begins with a crisp, shortbread-esque crust and is filled with a smooth, bright lemon filling. It’s a refreshing dessert that’s perfect for warmer weather, but is really wonderful any time of year. Recipe includes a how-to video!
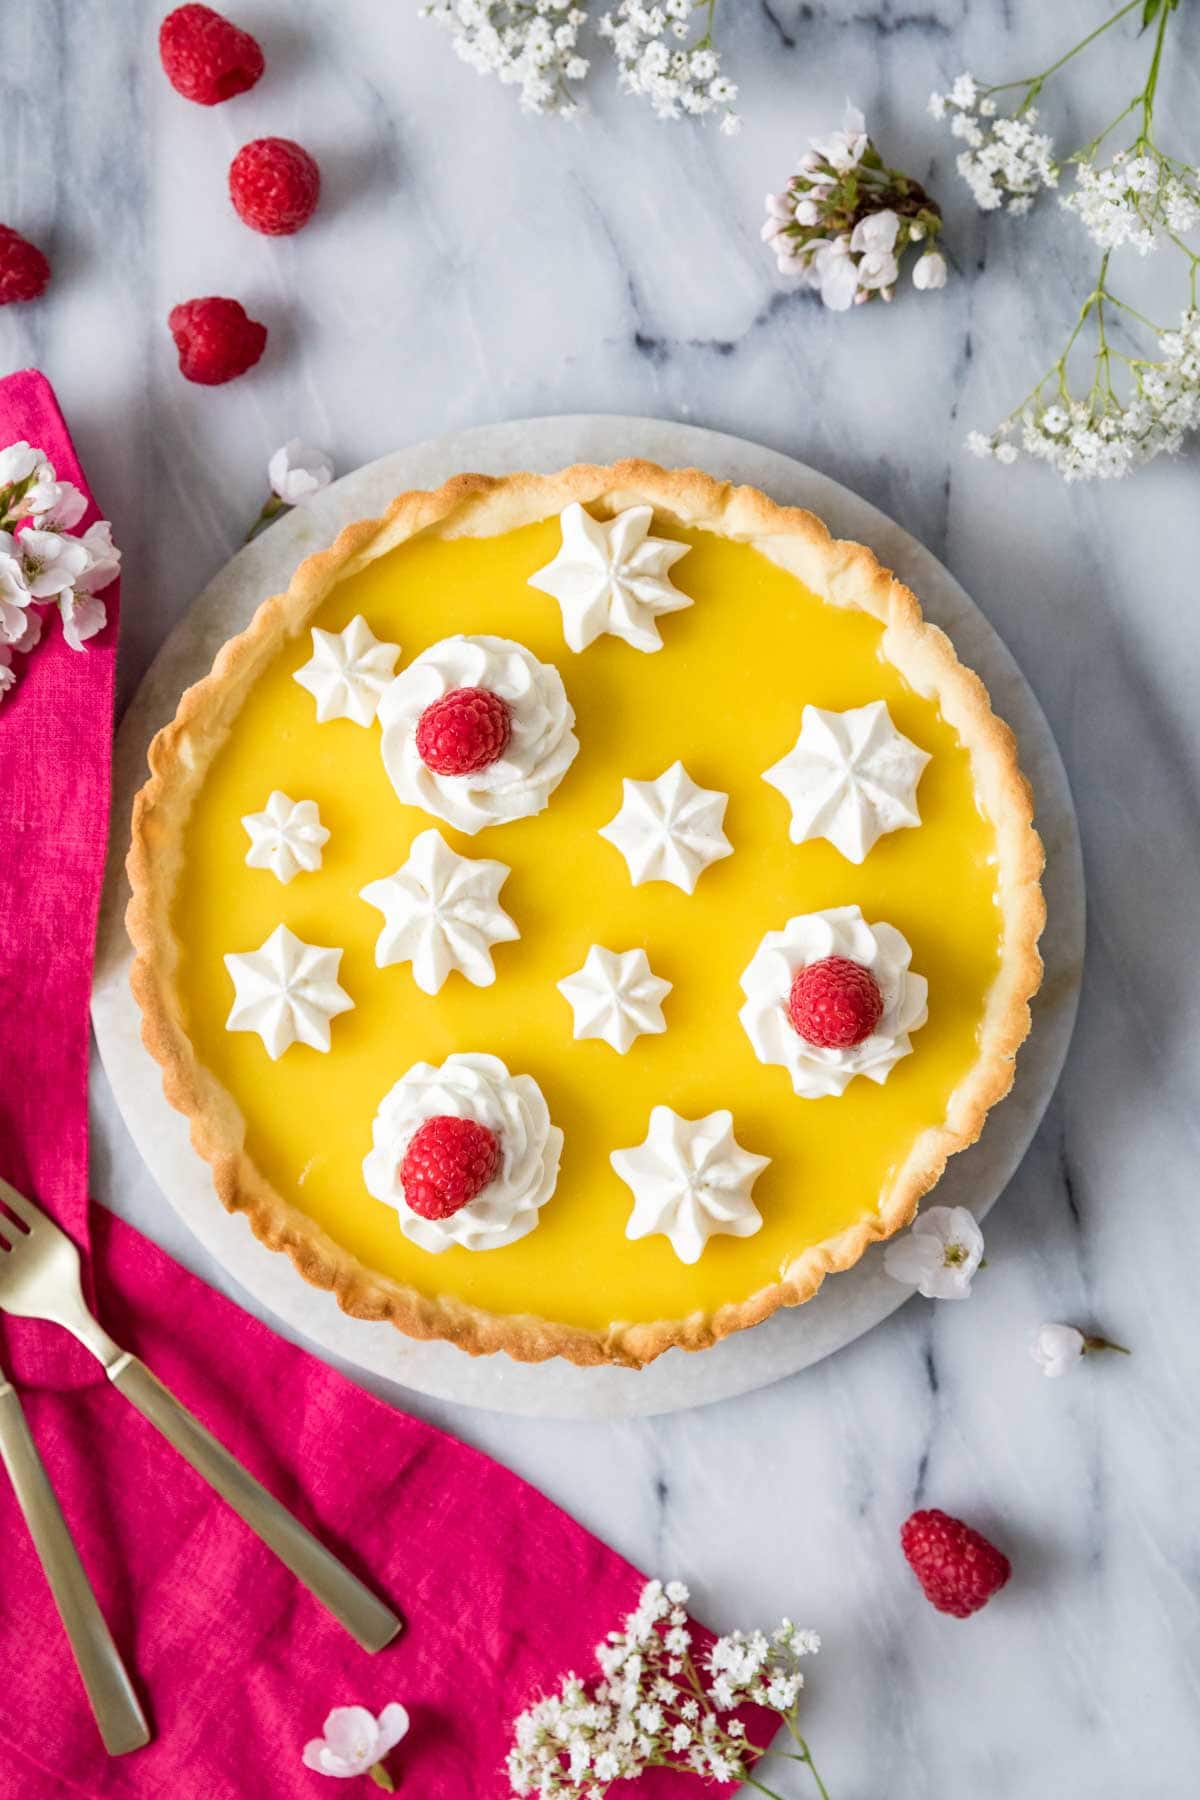
A Simple, Homemade Lemon Tart
Making up for the dreary weather we’ve been having recently with this bright and sunny lemon tart.
It’s pure sunshine with a crisp, buttery crust cradling a silky-smooth lemon curd filling that’s equally tangy and sweet. Top it off with a fluffy cloud of homemade whipped cream and just try to keep yourself from going back for a second slice. Resistance/willpower… a skill I’m yet to master 🥴
I used to find tarts to be intimidating, but they are honestly simple to make and not much different than a pie. The most difficult part is having patience, as it will have to chill in the fridge overnight before serving, so keep that in mind if you’re making it for an event. On that note, it’s perfect for making in advance!

My recipe includes three well-balanced layers:
- Pâte sucrée crust: Tender, sweet, and buttery pastry that holds up well against the creamy filling. It’s sweeter than traditional pie crust and tastes similar to a shortbread cookie. It would be delicious on its own, but of course we’re going to be filling it with…
- A rich, tangy lemon filling: A delightful balance of sweetness and tanginess that sets up just firm enough to neatly slice. This is essentially the same filling used in my lemon bars.
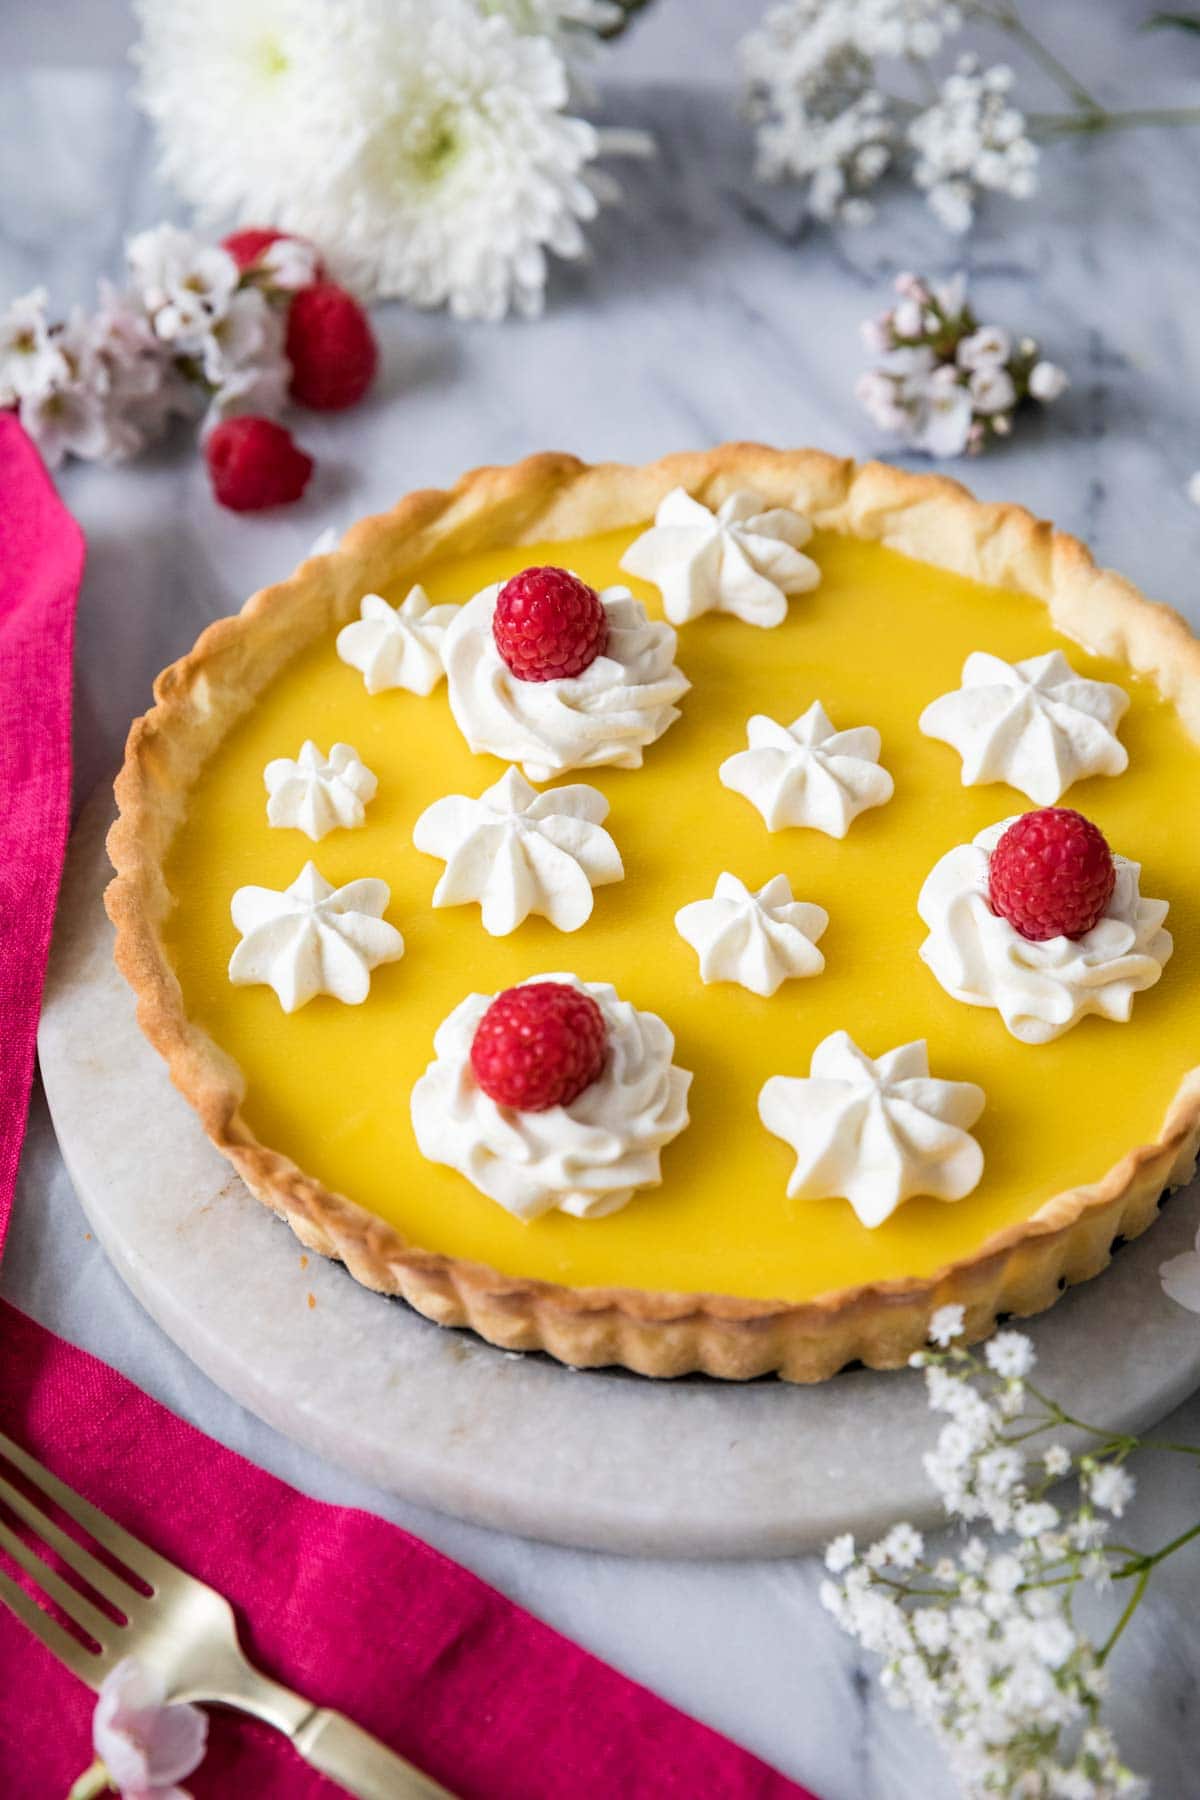
- Optional whipped cream topping: Adds a light, creamy finish that tempers the tartness of the lemon. This can be piped or dolloped to suit your preferred presentation style. I piped it prettily for pictures, but in reality I typically just plop a large spoonful on top of my slice before enjoying.
What You Need
Use high-quality ingredients ensures a vibrant, delicious, and beautifully textured lemon tart. Specifically, you will need:
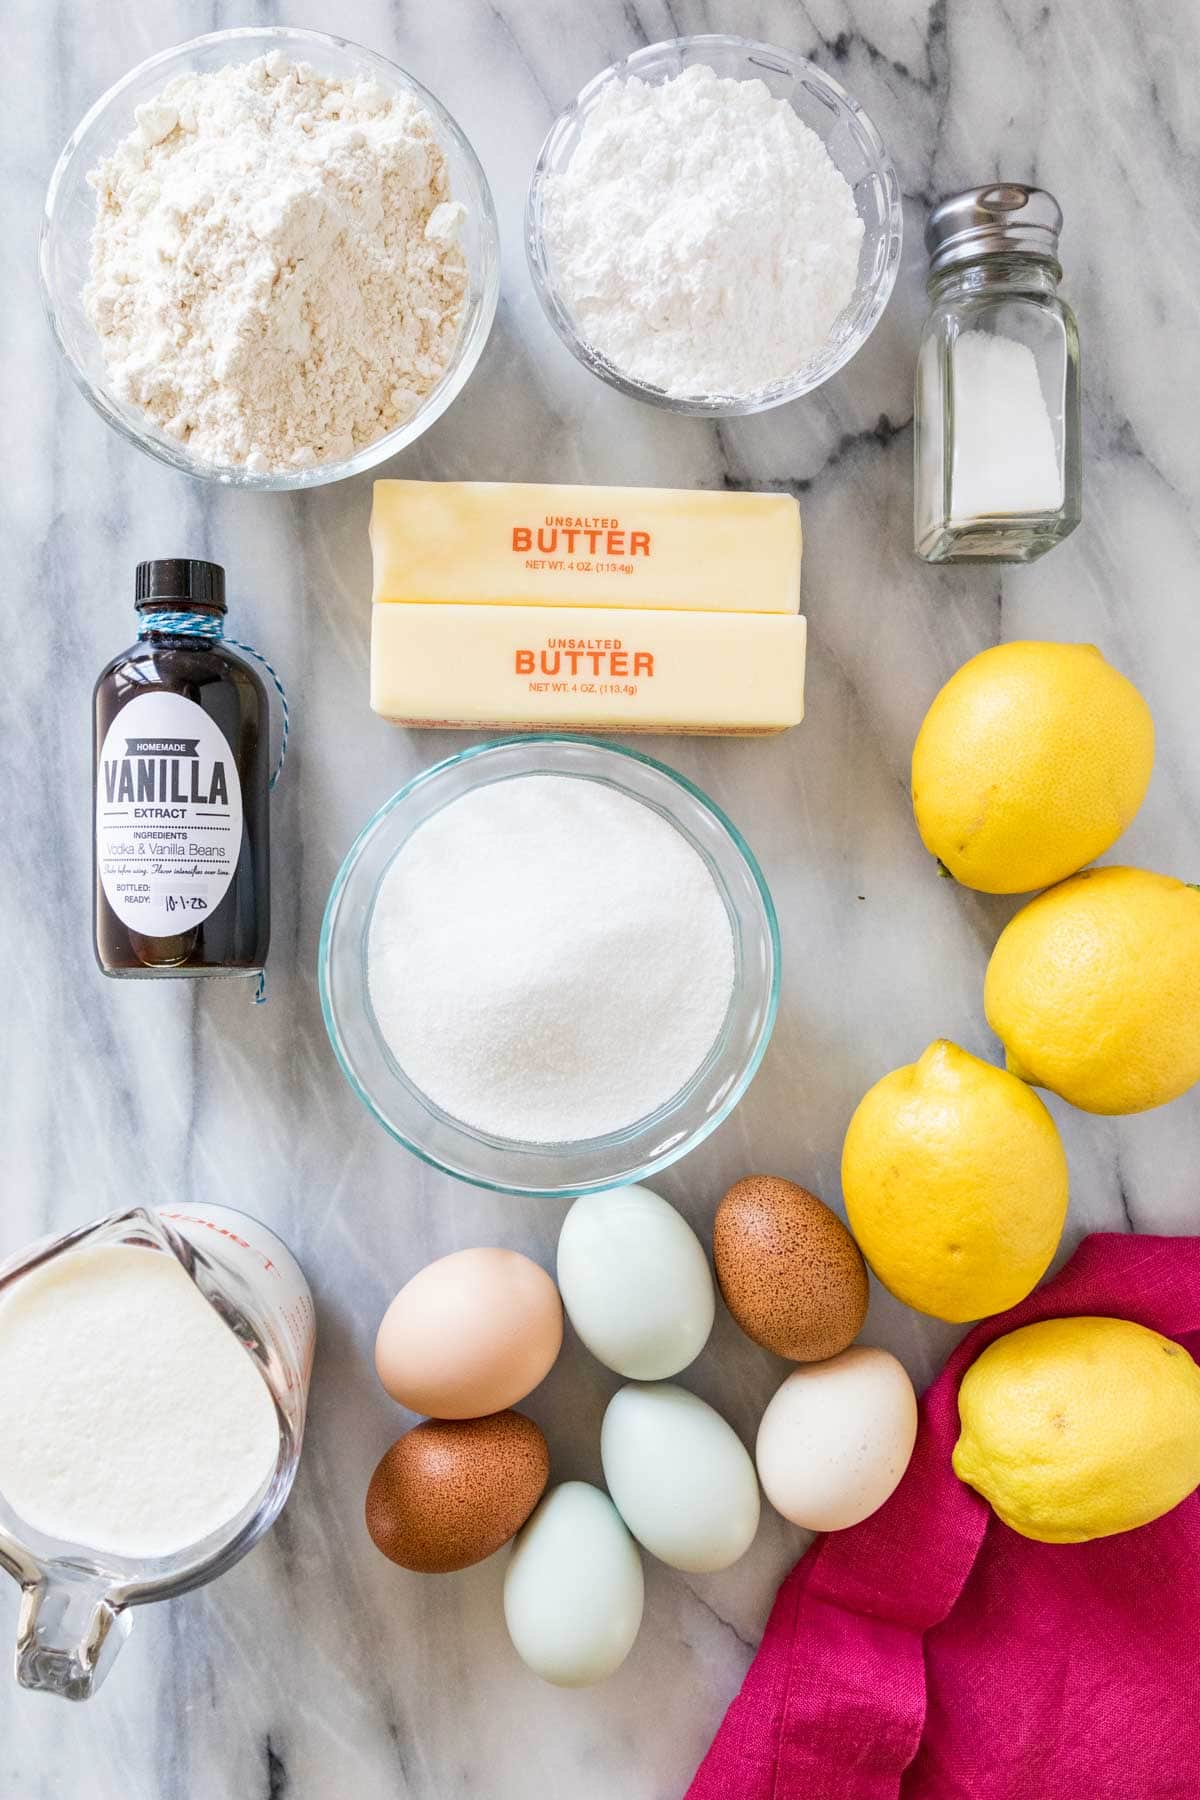
- Butter. Use unsalted butter and make sure it’s super cold before you add it to the crust (you can even place it in the freezer for 10-15 minutes beforehand). If you can find it and want to spring for it, European butter works very nicely here!
- Eggs. We’ll use eggs in both the crust and the filling. For the crust, make sure your egg is chilled before adding it. For the filling, we’ll use two whole eggs and a few extra yolks. If you’d like to use your leftover egg whites instead of throwing them away, you can use them to make meringue cookies, French macarons, or a batch of marshmallow frosting. You could even use it to make a meringue to top off the pie (like you would a lemon meringue pie), but I prefer to use whipped cream instead.
- Lemons. Squeeze your own lemons! The bottled stuff just doesn’t come close flavor-wise (I had a few family members who insisted it didn’t make a difference, but a taste-test left me vindicated, and Bon Appetit also validates my claim, discussing the oxidation of the bottled stuff and whatnot) . This is critical, and I only guarantee tasty results if you follow this rule 😉
- Powdered sugar. We’ll use a bit of powdered sugar in the crust for tender, shortbread-esque results.
- Vanilla extract. I don’t use any vanilla in the filling as it undermined the lemon flavor rather than flattered it, but a splash in the crust and the whipped cream on top does accent the filling nicely.
SAM’S TIP: It is important to keep your tart crust ingredients as cold as possible! If they get too warm, the sides of your tart could collapse while baking. A food processor is my preferred tool for preparing the crust for this reason (a food processor works quickly and you don’t need to use your hands, which can warm the ingredients), but you could alternatively use a pastry cutter instead.
This is just an overview of the ingredients I used and why. For the full recipe please scroll down to the bottom of the post!
How to Make Lemon Tart
Make the tart crust (pâte sucrée)
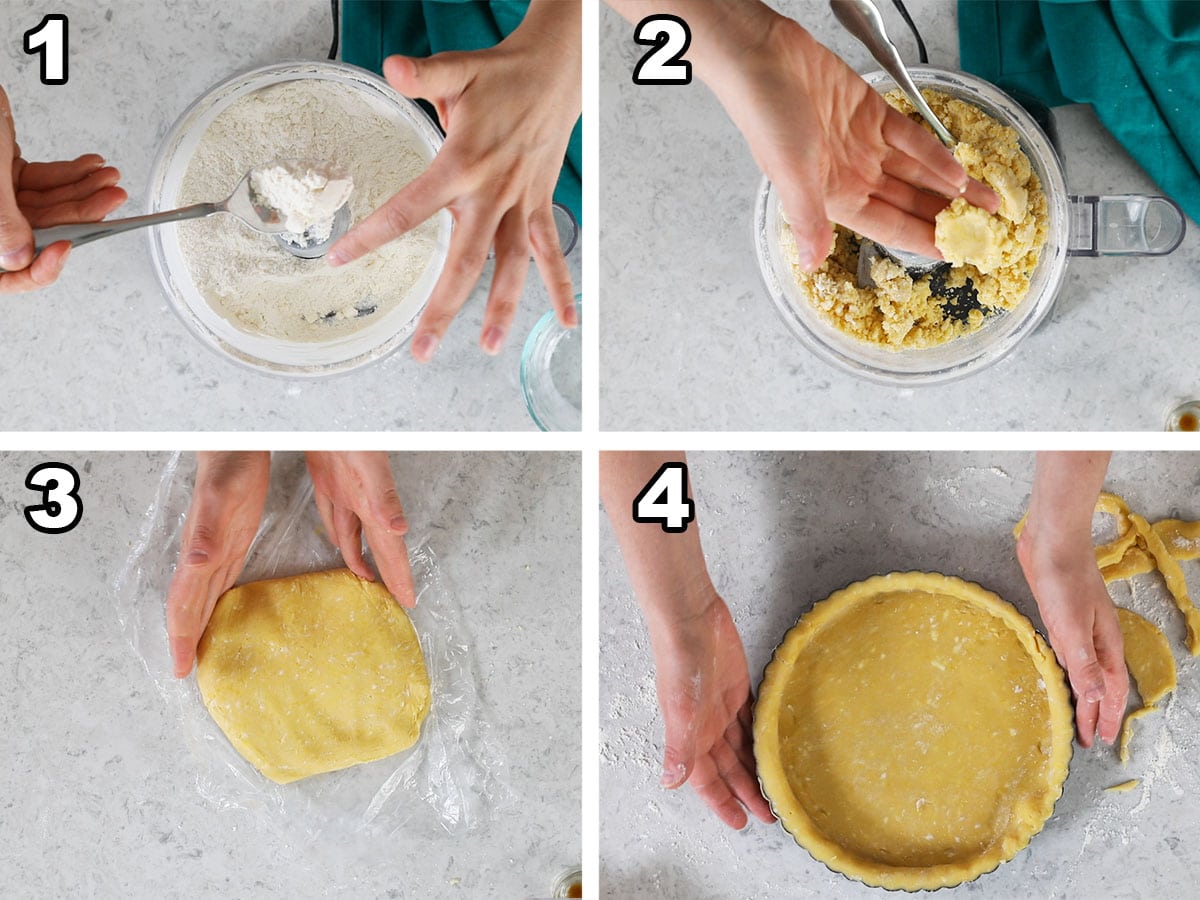
- Pulse together the flour, sugar, and salt in a food processor, then add the butter and pulse again until coarse crumbs form.
- Combine the egg and vanilla (I whisk them together in a small dish to evenly distribute the vanilla extract) then pour into the food processor and pulse until the dough begins to cling together.
- Form the dough into a disc, wrap in plastic (or parchment paper), and place in the fridge to chill for 1 hour. See those specks throughout the dough in the photos above? That’s butter, you want to see that!
- Roll the dough into a 10-11″ circle before pressing into a 9″ tart pan. Tip for when you’re rolling out your dough: do so on a floured surface and periodically use a spatula to scrape up the bottom of the dough to keep it from sticking. To transfer the dough to the tart pan, simply roll it up around your rolling pin then unroll it over the tart pan (I demonstrate this in my video).
Bake the crust
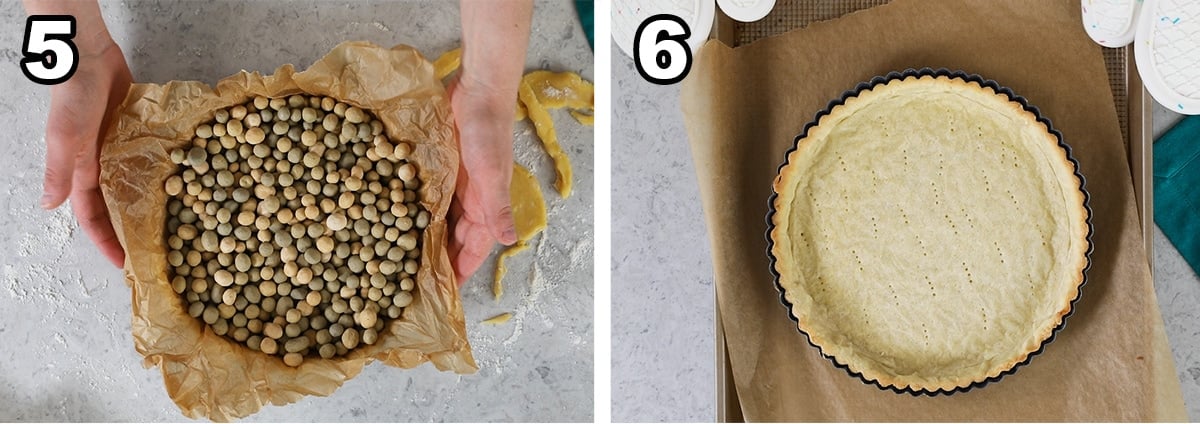
- Prick the bottom of the crust all over with a fork, cover with parchment paper, and fill with pie weights. I crumple (and un-crumple) my parchment paper several times so that it fits nicely in the pie shell. Chill in the freezer for 30 minutes.
- Bake the crust for 20 minutes at 375F, then carefully remove the parchment and pie weights and bake for another 5 minutes/until light browning occurs.
Prepare the Filling
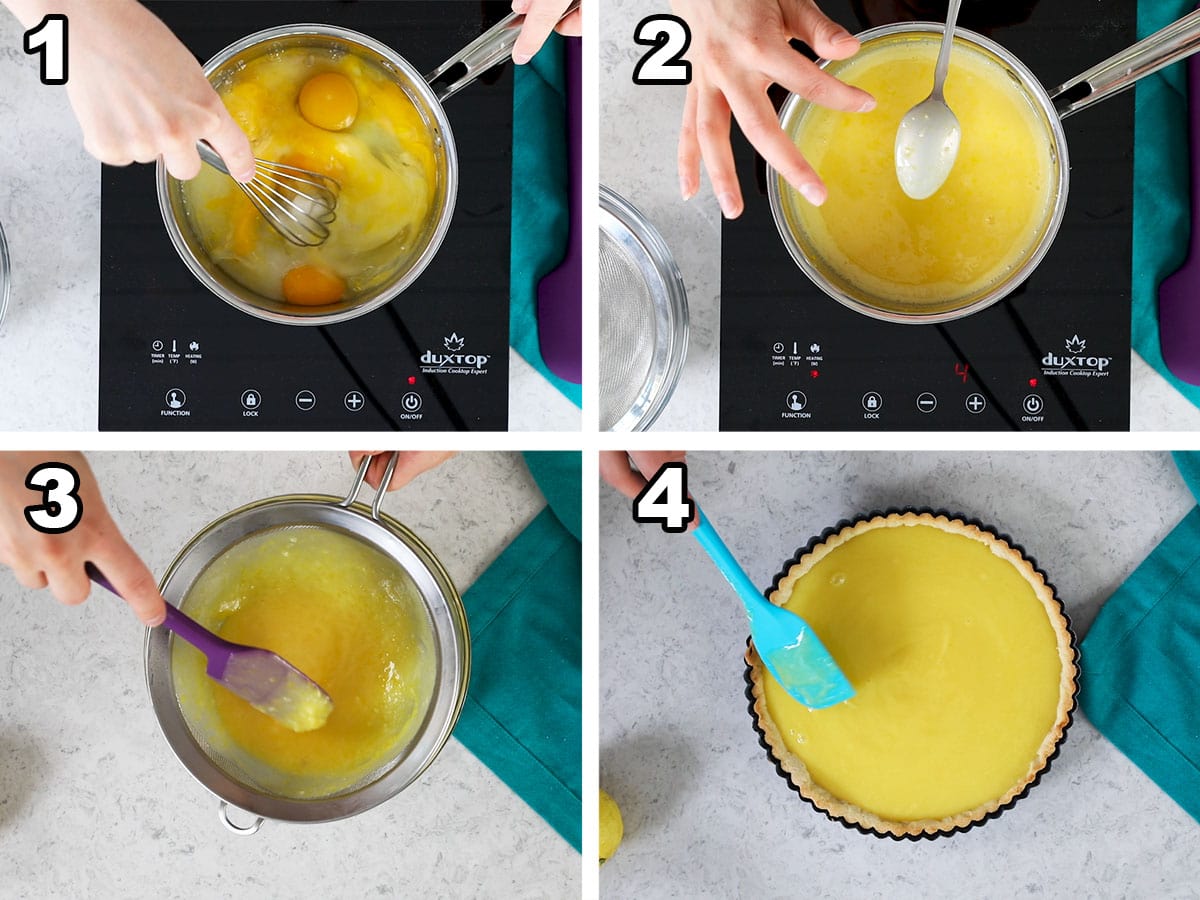
- Whisk together all ingredients except the butter in a medium sized pot. Add the butter and turn the heat to medium low.
- Stir constantly while the mixture cooks. Once it thickens and coats the back of a spoon, remove the curd from the heat.
- Pour the filling through a fine mesh strainer into a heatproof bowl, then pour into your tart crust. The strainer is key, it filters out any impurities, seeds, or small bits of cooked egg that may have occurred. You need to use one for a silky smooth filling.
- Evenly spread the filling into the crust, and smooth the surface. Let cool at room temperature for one hour, then transfer to the fridge for at least 6 hours.
Whipped Cream
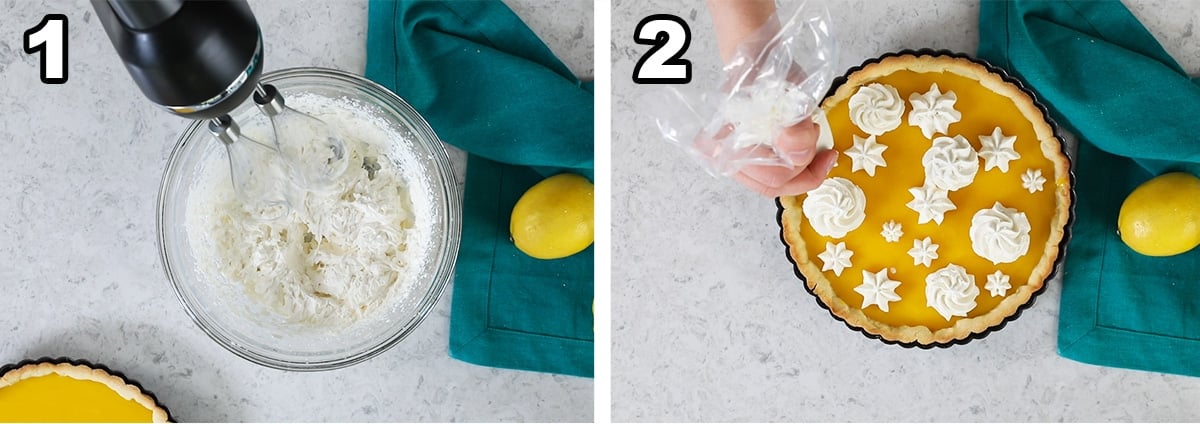
- Whip the cream, powdered sugar, and vanilla until stiff peaks form.
- Spread or pipe onto the chilled tart, slice, and enjoy!
SAM’S TIP: While you can always just spread the whipped cream on top of your lemon tart, I like to use the Ateco 848 piping tip (linked in the recipe card below) to create a pretty piped design.

Frequently Asked Questions
If your lemon tart is runny, the mostly likely cause is not cooking the filling long enough. It should be nicely thickened when you pull it off the stove. If you’d like a visual, see the video below to see the exact consistency mine is when it’s done; I like to check to make sure it coats the back of a spoon before I pull it off the heat. When I run my finger through the curd (on the back of the spoon) the trail that my finger makes should hold and the curd shouldn’t flow back over it.
Yes, I think limes, oranges, or even grapefruits would work well.
Yes! Since this tart contains an egg-based custard filling, I recommend refrigerating it. Make sure to keep it covered to prevent any fridge odors from absorbing into the tart.
Pâte sucrée is the conventional choice, but you could substitute my graham cracker crust instead.
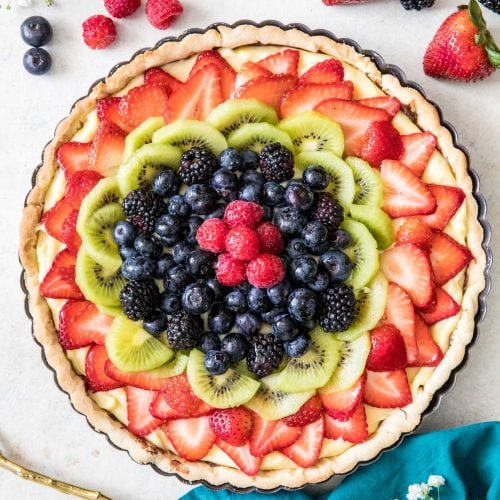
Once finished, you can decorate your lemon tart with fresh berries, mint sprigs, or even edible flowers. Do you prefer to decorate yours, or keep it plain (if you go all-out with the decorating, make sure you tag me on Instagram so I can see it!)?
Enjoy!
Let’s bake together! I’ll be walking you through all the steps in my written recipe and video below! If you try this recipe, be sure to tag me on Instagram, and you can also find me on YouTube and Facebook

Lemon Tart
Ingredients
Tart Crust:
- 1 ½ cups (190 g) all-purpose flour
- ½ cup (65 g) powdered sugar
- ¼ teaspoon salt
- 8 Tablespoons (113 g) unsalted butter cold & cubed
- 1 large egg cold preferred
- ½ teaspoon vanilla extract
Filling:
- 2 large whole eggs
- 4 large egg yolks
- ½ cup (120 ml) freshly-squeezed lemon juice (typically 4 lemons for me)
- 1 cup (200 g) granulated sugar
- ⅛ teaspoon salt
- ½ cup (113 g) unsalted butter cubed
Whipped Cream (optional):
- ¾ cup (177 ml) heavy cream
- ¼ cup (30 g) powdered sugar
- ½ teaspoon vanilla extract
Recommended Equipment
Instructions
For the tart crust:
- To the basin of a food processor, add flour, sugar, and salt. Briefly pulse to combine.1 ½ cups (190 g) all-purpose flour, ½ cup (65 g) powdered sugar, ¼ teaspoon salt
- Add butter and pulse until coarse crumbs form (about ten 1-second pulses)8 Tablespoons (113 g) unsalted butter
- In a separate, small dish, whisk together egg and vanilla. Drizzle over flour mixture, and pulse until dough just begins to cling together.1 large egg, ½ teaspoon vanilla extract
- Carefully remove from food processor (watch the blade) and shape dough into a disc, wrap in plastic wrap, and chill for 1 hour.
- Roll chilled dough into a 10-11″ (25cm) disc and press into a 9″ (23cm) tart pan. Prick the bottom all over with a fork, line with parchment paper, and fill with pie weights or dry beans. Freeze for 30 minutes, meanwhile preheat oven to 375°F (190°C).
- Once crust has chilled and oven is preheated, bake crust in center rack of 375°F (190°C) oven for 20 minutes or until edges are light golden brown. Remove parchment and weights (carefully), then bake for an additional 5 minutes (the bottom of the tart should be beginning to turn lightly golden). Prepare lemon filling
Lemon Filling
- In a medium-sized, stainless steel saucepan (see note), combine eggs, egg yolks, lemon juice, sugar, and salt. Add butter and cook over medium-low heat, stirring constantly, until mixture is thickened and coats the back of a spoon.2 large whole eggs, 4 large egg yolks, ½ cup (120 ml) freshly-squeezed lemon juice, 1 cup (200 g) granulated sugar, ⅛ teaspoon salt, ½ cup (113 g) unsalted butter
- Remove from heat and pour mixture through a fine mesh strainer into a bowl, then pour into tart crust and spread evenly. Cool at room temperature for 1 hour, then refrigerate for at least 6 hours or overnight.
Whipped Cream (optional)
- Combine heavy cream, powdered sugar, and vanilla extract. Beat on high speed until stiff peaks form. Pipe or dollop whipped cream onto tart before serving. I used an Ateco 848 to add the decorative whipped cream on top.¾ cup (177 ml) heavy cream, ¼ cup (30 g) powdered sugar, ½ teaspoon vanilla extract
Notes
Tart pan
I do not grease my tart pan. When trying to line the unbaked tart crust with parchment paper (step 5) it is helpful to crumple the parchment paper, uncrumple, crumple again, then uncrumple before using. This helps it fit snugly and more flush into the tart crust.Filling
The tart crust does not have to be completely cooled before adding the lemon filling, in fact the filling can be added when the crust is hot right out of the oven. Sometimes I’ll begin preparing the lemon filling while the crust is still in the oven.Saucepan
When cooking the filling, use a non-reactive pan, such as stainless steel, glass, or enameled cast iron. Avoid using aluminum, copper, or iron (such as non-enameled cast iron) pans, which can react with the lemon and cause a metallic taste.Storing
Store covered in the refrigerator for up to 5 days. I store my tart in the tart pan and do not remove unless I want to put it on a serving plate. While I haven’t personally frozen this tart, I think it would freeze fine (after cooling and setting completely).Nutrition
Nutritional information is based on third-party calculations and should be considered an estimate only. Actual nutritional content will vary based upon brands used, measuring methods, cooking method, portion sizes, and more.



malie
can i use a difrent pan for this recipie?
Leslie
AMAZING! This is such a fresh, bright, summery tart and using fresh-squeezed lemon juice makes allllll the difference in this tart’s flavor. I will 100% be making this again.
Emily @ Sugar Spun Run
Thanks for the review, Leslie! We are thrilled to hear that you enjoyed the tart so much 😊
Jbird
Hi Sam,
I planned on making mini fruit tarts for Mother’s Day but I’d have to travel a bit with them. I think this lemon tart would be easier to travel with but do you think it could be made into mini tarts? I have the silicone mold that makes about a dozen mini tarts.
Thank you!!
Emily @ Sugar Spun Run
Hi Jbird! This recipe should work fine as mini tarts, but we’re not sure how many it will make. We hope they turn out beautifully for you! 😊
Jbird66
Thank you! I’ll give it a shot 🥧😊