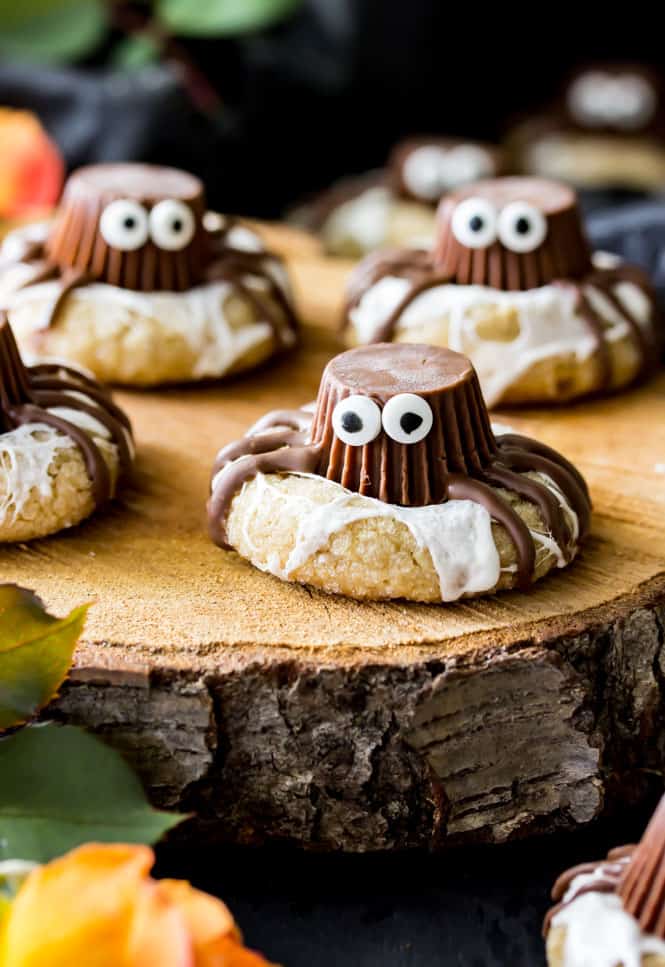
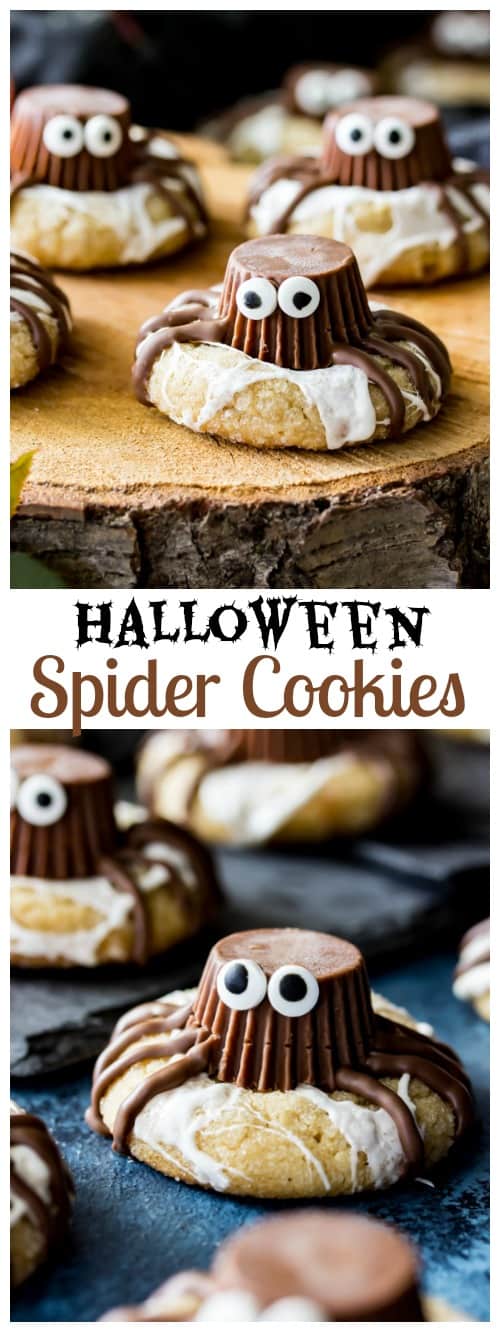
These adorably spooky Spider Cookies are perfect for Halloween! Made with peanut butter cookies, marshmallow “spiderwebs”, and peanut butter cup bodies with candy eyes these Halloween treats are fun to assemble and almost too cute to eat.
So, how do you feel about spiders?
How about spider cookies with adorably huge candy eyes? Ones with peanut butter and chocolate bodies, with dark chocolate legs snuggled tightly onto marshmallow cobwebs?
I can tell you that this is the only kind of spider that I’d be happy to find sitting unexpectedly on my kitchen counter, packed away in a lunch box, or hiding out in a Tupperware container.
I can not take the creative credit for these cookies — I saw them all over Pinterest last Fall and decided that I had to do my own version this year. I used a slight variation of my favorite peanut butter cookies for the bases and then decided to drape them in sticky marshmallow webbing.
The cookies are made in a few parts:
First thing’s first, put all of your Reese’s cups in the refrigerator to chill before you even begin. This will make them much easier to handle when you start your assembly. You will want to use Reese’s miniatures (not the teeny tiny ones that you can usually find in the checkout aisle), they’re just the right size and shape for our spider bodies.
Next, you need to prepare and bake your peanut butter cookies that will be the bases for these spider cookies. Once they’re baked but not entirely cool, use one of your chilled Reese’s (I leave the foil on at this point) to make an indent in each cookie, just press and remove. This will make it easier to attach your spider bodies later on down the road.
Once your cookies are cooled you get to make your marshmallow webs.
They’re definitely messy, but the technique is simple. Working with just a handful of marshmallows at a time, heat them in a microwave safe bowl until they begin to puff (just a few seconds).
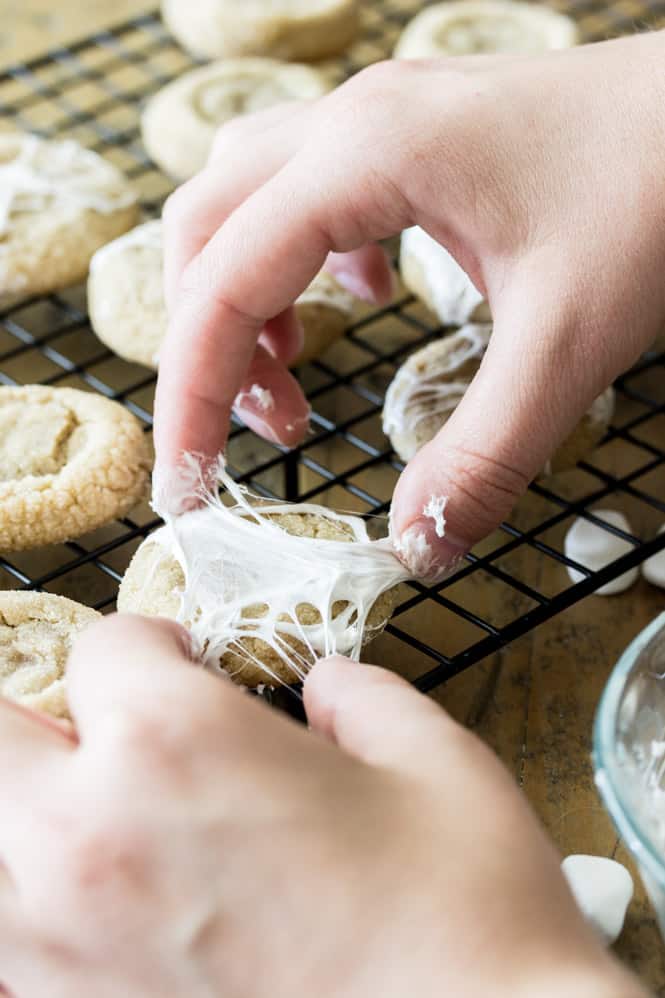
Remove them from the microwave, stir with a spoon, and then dip your thumb and forefinger of both hands into the marshmallow (you don’t need a lot!). Pinch your fingers together and then gently pull them apart, stretching the marshmallow over your cookies (see above) and then tucking the ends underneath to secure the webbing.
I recommend using a cooling rack with wax paper beneath it to place your cookies once they have their spiderwebs. Repeat this technique with each cookie until they are all covered.
You’ll find that the marshmallow that you’re using hardens quickly and will be unusable after a few bowls, so divide it up into multiple bowls rather than heating all of your marshmallows at once.
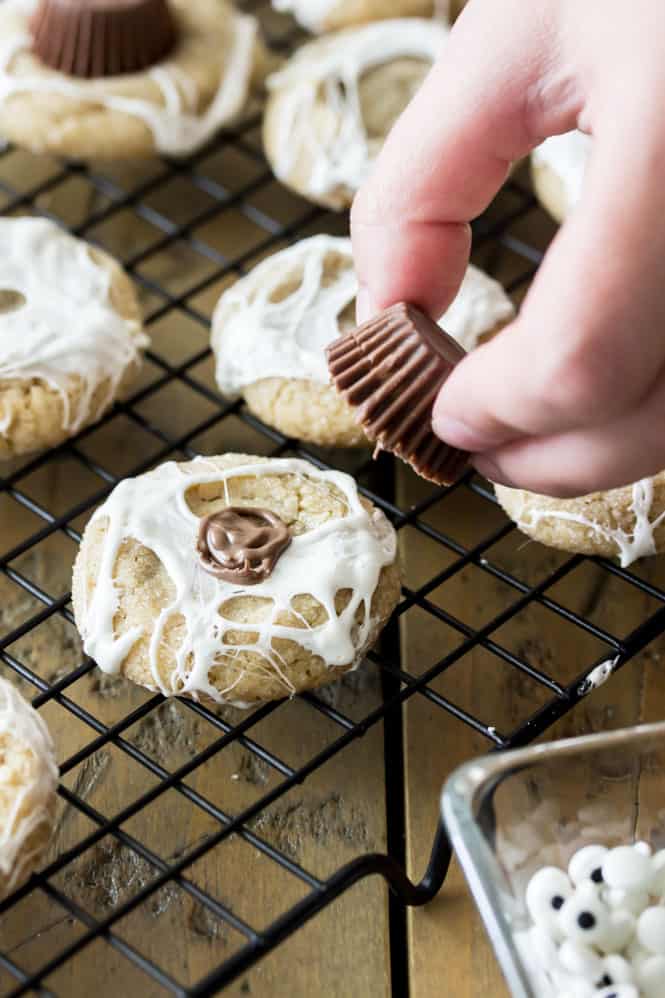
Next comes our melting chocolate. I definitely recommend using melting wafers as this chocolate dries fast. Use a small amount in the indent of each spider cookie, and then place your (unwrapped) Reese’s top down into the chocolate (thanks to our Reese’s indents from earlier, they will fit perfectly in the indents). The chocolate will cement your spider bodies in place.
A small dab of chocolate on the back of each eye will hold the eyes in place, and four lines on either side of the body will make up your spider legs.
Your cookies will probably still be a bit sticky from the marshmallow and the less you have to pick them up the easier it will be. This is why I place mine on a cookie sheet with wax paper beneath (for easy cleanup), that way you can add your spider eyes and legs without having to pick them up or handle them too much.
The chocolate will set in a matter of minutes, much faster than the marshmallow will. If you plan to stack or transport these cookies I recommend letting them sit out for a few hours before doing so — that seems to be how long it takes for the marshmallow to set.
It’s a lot of steps and your hands are definitely going to get sticky, but I think it’s worth it.
So what do you think!? Cute or creepy?
If you’re looking for candy eyes, I found mine at Wal Mart in their cake decorating section and I believe Michaels also sells them — I used the small size for these spider cookies.

Spooky Spider Cookies
Ingredients
- 1 ¼ cup (282 g) unsalted butter softened to room temperature
- 1 ½ cup (300 g) light brown sugar tightly packed
- ¼ cup (50 g) sugar
- 1 cup (280 g) creamy peanut butter
- 2 eggs + 1 egg yolk
- 1 teaspoon vanilla extract
- 3 ¼ cups (400 g) all-purpose flour
- 1 Tablespoon corn starch
- 1 ½ teaspoons baking soda
- 1 ½ teaspoon salt
- ½ cup granulated sugar for rolling
- 10 ounces (285 g) dark chocolate melting wafers
- 2 cups mini marshmallows divided
- 40 Reese's miniature peanut butter cups Chilled (I place mine in the refrigerator while I prepare the cookies, it keeps them from melting)
- small candy eyes for decorating
Instructions
- Combine butter and sugars in the bowl of a stand mixer and beat until well combined (about 1 minute).1 ¼ cup (282 g) unsalted butter softened to room temperature, 1 ½ cup (300 g) light brown sugar, ¼ cup (50 g) sugar
- Add peanut butter, stir well.1 cup (280 g) creamy peanut butter
- Add eggs and egg yolk, one at a time, pausing to scrape down the sides and bottom of the bowl after each addition.2 eggs + 1 egg yolk
- Stir in vanilla extract.1 teaspoon vanilla extract
- In a separate, medium-sized bowl, whisk together flour, cornstarch, baking soda, and salt.3 ¼ cups (400 g) all-purpose flour, 1 Tablespoon corn starch, 1 ½ teaspoons baking soda, 1 ½ teaspoon salt
- Gradually add flour mixture into the peanut butter batter, pausing occasionally to scrape down sides and bottom of bowl so that all ingredients are well-combined.
- Place your dough in refrigerator and chill for 30 minutes to one hour (start with 30 minutes, if the dough is too sticky or cookies come out too flat, return for another half an hour).
- Preheat oven to 375F (190C) and line cookie sheets with parchment paper. Pour remaining ½ cup of sugar into a small bowl and set aside.½ cup granulated sugar
- Once dough has chilled, remove from refrigerator and roll into 1 ½-Tablespoon-sized balls. Roll through sugar and place on prepared cookie sheet at least 2" apart.
- Bake on 375F (190C) for 8-10 minutes, remove from oven and allow to cool on cookie sheet for 5 minutes. Use your frozen Reese's (I keep mine wrapped) and gently make an indent by pressing the top of the Reese's into the top of each peanut butter cookie. Allow cookies to continue to cool completely on cookie sheet before proceeding.
Marshmallow Cobweb Instructions
- Place about ¼ cup of your mini marshmallows in a small microwave-safe dish.2 cups mini marshmallows
- Microwave for about 10 seconds or until marshmallows begin to puff.
- Remove and use a fork or spoon to stir, deflating your marshmallows.
- Using your thumb and forefinger of each hand, pinch some of the marshmallow filling. Stretch and pull the marshmallow apart with your fingers and drape it over your cooled cookies (See picture above for a visual guide).
- Marshmallow will cool quickly and become too difficult to use, once that happens with your first bowl of marshmallows, move on to a new bowl with another ¼ cup marshmallows and repeat steps until all cookies are decorated.
- Allow marshmallow to set for several minutes before proceeding with the chocolate -- the longer you wait the less sticky it will be.
Spider Decorating Instructions
- Prepare your dark chocolate melting wafers according to package instructions. Allow to cool 5 minutes before proceeding (if chocolate is too hot it will be harder to control when piping)10 ounces (285 g) dark chocolate melting wafers
- Pour into a small ziploc bag and snip a tiny, small corner off of the bag (the width that you want your spider legs to be)
- Pipe a small amount of chocolate into the indent on your peanut butter cookie. Work with one cookie at a time as the chocolate will harden fairly quickly.
- Place one Reese's cup on top of the melted chocolate, placing the top of the Reese's into the top of the Reese's.40 Reese's miniature peanut butter cups
- Pipe four chocolate lines on either side of the Reese's for the spider "legs".
- Dab a small amount of the chocolate on the back of a candy eye and press it against the side of the Reese's cup, repeat with another eye for your spider's eyes.small candy eyes
Nutrition
Nutritional information is based on third-party calculations and should be considered an estimate only. Actual nutritional content will vary based upon brands used, measuring methods, cooking method, portion sizes, and more.
PIN IT:
You Might Also Like:
Ghost in the Graveyard Dessert Shooters







Darcy
So fun and yummy!!
Emily @ Sugar Spun Run
So happy you liked them, Darcy! Happy Halloween 🎃
Katie
Delicious cookies! I skipped the marshmallow, and made white chocolate webs, which made it extra chocolate-y. Making these will be my new tradition. Thanks Sam!
Sam
I am so glad you enjoyed them, Katie! The chocolate spider webs sound delicious!! 🙂
Lynne Ham
I love your recipes and excellent directions. I am really into scratch baking/cooking because of my sweet little grandson who has peanut/tree nut allergies. We have to be very careful with the food that goes into that little mouth. Can you suggest another candy and cookie for this recipe? He’s limited on chocolate candy if store bought. Thanks for all the wonderful recipes🎃👻😈
Sam
Hi Lynne! I am so sorry I missed your comment earlier, I don’t know why I am just now seeing it. Either of these cookies would work well as a base:
Chocolate crinkle cookies
Thumbprint cookies
And what about making chocolate truffles for the spider body instead?
I hope that helps and I’m so sorry about the delayed response!
Jess
Is it possible to use marshmallow fluff instead of melting marshmallows?
Sam
Hmm, unfortunately I don’t think the marshmallow fluff will spread/stretch the same so I would recommend sticking with melted marshmallows.
Lisa
Just fyi – I don’t see the cornstarch mentioned anywhere in the instructions. Assuming it’s added to the flour mixture. I’m trying these today. They are super cute!
Sam
Whoops, yes, add to the flour! Sorry about that and I’ll add it to the instructions now. I hope you love the cookies!! 🙂
Sues
These are so cute!! I feel like I’ve made a mess like that with marshmallow SO many times, but with these, it ends up being a great/adorable mess!
Mikaru86
I’m usually not much into the whole decorating stuff, but I think I really have to try this. However I think I’ll use white chocolate to pipe on a spider web instead of using marshmallows. I really hate working with that sticky stuff XD
Sam
I’m not much of a decorator either but these were actually fun and not too tough! Not a bad idea to use the white chocolate instead of marshmallow, I hope you love them if you do try them!! 🙂
Mikaru86
I’ll let you know how they turn out. I really need to sit down and put together an update post. I’ve been baking every week, but I haven’t had any chance to sort through the pictures and write everything down.
Shawnna Griffin
hey girl- these are so cute! yummy! have a great week!